What's inside
As an Amazon Associate I earn from qualifying purchases. This post may contain affiliate links at no extra cost to you.
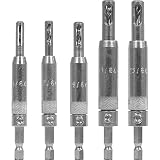
A self-centering drill bit, often called a hinge bit or Vix bit, guides a pilot hole to the center of a hinge’s countersunk screw hole. That matters on cabinet doors: a small sideways error can pull a hinge out of line, leave the screw head sitting crooked, or make the door shift as you tighten it.
For most cabinet hinges, a basic spring-loaded bit sized for the hinge screws is enough. The useful choice is less about buying the most elaborate set and more about matching the bit to the screw, keeping the hinge from moving, and drilling only as deep as needed.
As an Amazon Associate we earn from qualifying purchases at no extra cost to you.


What we cover
What to buy for cabinet hinges
Start by checking the screw supplied with the hinge. Self-centering bits are commonly sold by pilot-hole diameter, with sizes around 5/64, 7/64, and 9/64 inch among the common options. These are not interchangeable: the correct size depends on the screw’s core diameter and the material. If the hinge maker specifies a pilot size, follow that. Otherwise, compare the screw with the bit’s cutting diameter and test on scrap of the same material.
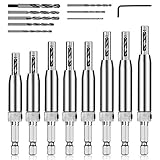
A self-centering hinge drill-bit set is a practical pick if you install different hinges or work with more than one screw size. For one kitchen repair, a correctly sized single bit is usually the cheaper, simpler choice.
Look for a spring-loaded guide sleeve that slides smoothly without excessive side play. The sleeve should fit the countersink in the hinge hole; a sleeve that is too wide will not seat, while one that is too narrow may not center reliably. Replace or avoid a bit with a bent shaft, chipped cutting edge, or sleeve that binds.
Bit options at a glance
| Option | Best for | Trade-off |
|---|---|---|
| Single self-centering bit | A small job with one known screw size | Lowest cost, but not useful if the size is wrong |
| Set of self-centering bits | Several hinge types or future repairs | More flexible; unused sizes may sit in the drawer |
| Ordinary twist bit and careful layout | Occasional work where exact centering is not critical | Cheap, but easier to drift off center in a countersunk hole |
For repeated installation, a self-centering bit with an adjustable depth stop can help make holes consistent. It adds cost and setup, and it is not essential for a few hinges; a strip of tape on the bit can serve as a simple visual depth mark.
Use a drill, not an impact driver
A cordless drill or drill/driver gives better control than an impact driver for this task. Set the clutch low or use the drill’s low-speed range, and keep the bit square to the surface. High speed and heavy pressure can make the cutter skate, overheat, or plunge too deep. A hammer drill’s hammer mode should be off; impact and hammer action offer no benefit in wood or cabinet-board pilot holes.
The bit is intended to start the screw’s pilot hole, not bore a clearance hole through the door. Many cabinet screws are roughly 3/4 to 1 inch long, but the required pilot depth depends on the hinge and door construction. Use the hinge instructions where available. A depth stop or tape mark helps avoid drilling through a thin door or into the visible face.
How to install the bit and drill accurately
First, position the hinge and clamp it or hold it firmly so it cannot shift. If you are replacing a hinge, use the existing holes when they are sound and correctly placed. Put the bit’s guide sleeve into the countersunk hinge hole, then apply light pressure so the sleeve seats against the angled sides of the hole.
Drill at low speed with the bit straight. Let the cutter do the work; forcing it can deform the guide sleeve or enlarge the pilot. Pull the bit out while it is still turning slowly if the flutes are packed with dust, then clear the hole. Repeat for each screw hole. Before driving the screws, lift the hinge and check that the pilot holes are centered within the countersinks.
Drive screws with a drill/driver at a conservative clutch setting, finishing by hand if needed. A screw that starts crooked or suddenly becomes hard to turn may be cross-threading in the pilot or hitting a knot, chip, or old screw fragment. Back it out rather than forcing it. Over-tightening can strip particleboard or MDF, even when the pilot hole is well centered.
Common failures and fixes
If the pilot is off-center, check that the sleeve fits the hinge countersink and that the hinge did not move during drilling. A self-centering bit cannot correct a loose hinge or a damaged, nonstandard countersink. Clamp the hinge, or mark the screw centers and use a drill guide if the hardware shape does not support the sleeve properly.
If the screw spins without tightening, the hole may be too large, the material may be damaged, or the screw may be too short. Do not keep turning it. For a minor stripped hole in solid wood, a glued wooden plug can provide fresh material after the glue cures; for damaged particleboard, a suitable repair insert or a new hinge position may be more dependable. If the bit leaves a ragged hole, inspect its cutting edge and reduce pressure rather than assuming a larger bit will solve it.
A self-centering bit earns its keep when several hinge screws must land neatly and consistently. For one straightforward repair, a single correctly sized bit—or even a plain bit used carefully—can be enough. The key is a secure hinge, a matching pilot size, and controlled depth.