What's inside
As an Amazon Associate I earn from qualifying purchases. This post may contain affiliate links at no extra cost to you.
What we cover
Quick answer: match the guide to the job
Choose a portable drill guide for occasional straight holes in different locations, a drill-press bushing for repeatable holes in a fixture you can build or already own, and a drilling jig when the workpiece needs positive alignment, a fixed angle, or fast repetition. The best choice depends less on the drill bit alone than on how you’ll hold the work, control the angle, and repeat the setup.
These tools are not interchangeable. Portable guides steady a handheld drill; bushings guide the bit through a rigid hole; jigs locate the workpiece and guide the drilling operation. Check the guide’s actual capacity against your bit’s shank and the hole you need to make—those are not always the same measurement.
As an Amazon Associate we earn from qualifying purchases at no extra cost to you.
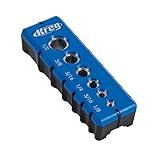


Portable guides vs. bushings vs. jigs
| Guide type | Typical bit range or capacity | Angle control | Material fit | Setup and best use |
|---|---|---|---|---|
| Portable drill guide | Common models accept drill bits up to about 3/8 in. or 1/2 in. by shank; verify chuck capacity and guide travel. | Many offer 0–45° adjustment with marked stops; accuracy depends on setup and how firmly the base contacts the work. | Wood, plastics, and some metals when the guide is securely clamped and the bit is suitable for the material. | Usually a few minutes to align and clamp. Best for occasional holes in large or already-installed parts. |
| Guide bushing in a fixture | Choose by the bushing’s inside diameter and the bit’s shank diameter. Common woodworking bushings have bores around 1/4–1/2 in.; sizes vary. | Fixed by the fixture. The bushing guides the bit straight, but does not set an angle unless the fixture does. | Wood and sheet goods are common. A metal bushing can wear more slowly than a wooden guide hole. | Quick once the fixture is made. Best for repeated holes at one location or pattern. |
| Drilling jig | Varies widely: a pocket-hole jig may use a specific bit, while doweling jigs accept selected bit sizes or bushings. | Fixed or adjustable according to the jig; built-in stops and fences improve repeatability. | Depends on the design. Many woodworking jigs suit boards and panels; check clamping and clearance for thick or narrow stock. | Initial setup can take longer; repeated cycles are fast. Best for joinery, aligned holes, and production batches. |
The capacities above are typical ranges, not universal specifications. A guide that accepts a 1/2-inch shank does not necessarily support a 1/2-inch hole with every bit, and a bushing’s stated bore must leave enough clearance for the bit to rotate without excessive wobble.
Choose by situation
| Your situation | Best starting choice | Why |
|---|---|---|
| One-off repairs or holes on large panels | Portable drill guide | Moves to the work instead of requiring the work to fit under a drill press. |
| Several identical holes in a small project | Drilling jig or bushing fixture | Stops and fences reduce repeated measuring and alignment errors. |
| Small budget, basic woodworking, and a bench or scrap plywood available | Simple bushing fixture | A replaceable guide block can be inexpensive, though it takes care to build square and may wear. |
| Beginner who needs a few holes at a controlled angle | Portable guide with a broad, clampable base | It makes angle setup easier than freehand drilling, but still needs a stable workpiece and careful alignment. |
| Frequent joinery work with a defined hole pattern | Dedicated drilling jig | Purpose-built registration features speed up repetition and help keep the pattern consistent. |
| Very large bits, deep holes, or tight precision requirements | Drill press or a purpose-built fixture | Portable guides may flex, bind, or run out of travel; check the tool’s limits before committing. |
What matters when comparing models
Bit range and clearance
Look for the supported shank diameter, not just the largest hole shown in a product description. For a portable guide, confirm that the drill’s chuck fits the guide and that the guide can travel far enough for the bit length and hole depth. For a bushing, compare its inside diameter with the bit’s cutting diameter and shank; a loose fit permits wandering, while a tight fit can rub or bind. Twist bits, brad-point bits, and countersinks may also need different openings or clearances.
Angle control and reference surfaces
Angle markings are useful for setting a rough angle, but they do not guarantee accuracy. A guide can tilt if its base sits partly over an edge, a rounded surface, or a gap. For a critical angled hole, make a test hole in scrap of the same thickness, measure the result, and adjust before drilling the workpiece. A fixed jig is often more dependable for repeating one angle; a portable guide is more versatile when angles and locations change.
Material compatibility and clamping
Woodworking guides are not automatically suitable for every material. In wood, a sharp bit and a firmly clamped workpiece are usually the main concerns. Plastics can crack or melt if the bit overheats or grabs. Metal drilling needs a suitable bit, controlled speed, secure clamping, and a guide that will not shift under pressure. Avoid relying on hand pressure alone, especially with large bits or slippery stock.
Setup time versus repetition
A portable guide saves time when the hole location changes often. A jig takes longer to position or build, but can become faster over a batch. For example, if making a jig takes 20 minutes and saves 30 seconds on each hole, it breaks even after 40 holes: 20 minutes ÷ 0.5 minute saved per hole. That estimate excludes the added benefit of fewer layout and alignment mistakes.
Set up for straighter, repeatable holes
- Secure the work. Clamp it to a stable bench or support it so the drill cannot push it sideways. Keep clamps clear of the bit’s path.
- Mark and check the reference. Lay out the hole center, then position the guide or jig against a known edge or stop. Confirm that the reference edge is square where that matters.
- Test the alignment. With the drill unplugged or the battery removed, lower the bit to the mark and check that the guide is centered. For angle work, verify the setting with a square or angle gauge rather than trusting a scale alone.
- Drill steadily. Keep the guide’s base seated, use a suitable speed for the bit and material, and clear chips from deep holes. Do not force a binding bit.
- Inspect before repeating. Check the first hole for position, angle, and fit. Adjust the fence, stop, or clamping arrangement before drilling the rest.
Ownership: wear, cleaning, and common mistakes
In portable guides, wear or looseness in the sliding carriage, pivot, or drill-clamping mechanism can reduce accuracy. On a wooden fixture, the guide hole often wears first, especially when used repeatedly with a spinning bit. Replace a worn insert or make a fresh guide block instead of compensating by pushing the drill harder. Metal bushings can last longer, but inspect them for burrs, looseness, and heat-related damage.
Brush chips and dust away after use, and keep adjustment points free of packed debris. Store jigs flat so fences and stops do not get knocked out of alignment. Common causes of poor results include clamping the guide at an angle, using a bushing that is too loose, drilling through unsupported stock, and assuming that a marked angle is perfectly calibrated.
Bottom line
For flexible, occasional work, start with a portable drill guide that fits your drill and offers a stable base. For one repeated hole pattern, choose a bushing fixture or a dedicated jig; the fixture’s registration and wear resistance matter more than how quickly it can be moved between jobs. If the holes are deep, large, or unusually precise, consider whether a drill press or purpose-built setup is the safer and more repeatable option.