What's inside
As an Amazon Associate I earn from qualifying purchases. This post may contain affiliate links at no extra cost to you.
A cordless drill can turn an auger bit through a large hole, but the bit diameter is only part of the problem. Hole depth, wood species, knots, and how well you can control the tool all matter. For occasional holes in framing lumber, a strong 18V drill may be enough. For repeated holes with a 1-inch or larger auger, a right-angle drill or a drill with an anti-kickback system is usually the safer, less tiring choice.
As an Amazon Associate we earn from qualifying purchases at no extra cost to you.


What we cover
Choose by hole size and workload
For holes up to about 3/4 inch in ordinary framing lumber, a quality 18V or 20V drill with a two-speed gearbox and a side handle can do the job. A 1/2-inch chuck is useful because many larger auger bits have 1/2-inch shanks. Use low gear for control and torque; high gear is for smaller bits and faster drilling.
At 1 inch and above, especially with a self-feeding screw-tip auger, kickback becomes a real concern. If the bit catches a knot or exits the far side, the drill body can twist sharply. A dedicated right-angle drill puts the handle where you can brace it, while models with electronic anti-kickback protection can cut power when the tool rotates suddenly. Neither feature makes a jam harmless: keep both hands on the tool and stand where you can let it move without hitting your body.
If you need a drill for a few holes in a remodel, a standard high-torque drill may be the economical choice. For daily rough-in work or dozens of large holes, compare cordless right-angle drills with anti-kickback protection. They cost more and are bulkier, but the form factor and added control are useful when boring through studs repeatedly.
Which drill type fits the job?
| Tool type | Best use with augers | Main trade-off |
|---|---|---|
| Standard 18V/20V drill | Occasional holes, generally up to 3/4 inch in typical framing | Compact and less costly, but more vulnerable to wrist-twisting kickback |
| High-torque drill with side handle | Frequent larger holes where access allows a firm two-handed grip | Versatile, but still requires careful bracing and can be heavy |
| Right-angle drill | Large holes in tight stud bays or repeated rough-in work | Better reach and leverage; costs more and may be awkward in open areas |
| Impact driver | Fasteners, not routine auger drilling | Hex chuck and impact action are a poor match for large augers |
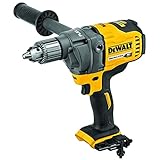
For a general-purpose purchase, look at high-torque cordless drills with a side handle. Check that the handle is included, not just compatible, and that the chuck accepts the bit shank you plan to use.
Battery, speed, and control matter
Large augers work the motor hard, so a small compact battery may overheat or run down quickly. A 4.0Ah or 5.0Ah pack is a sensible starting point for repeated holes; a larger pack can extend runtime but adds weight. If the tool is already nose-heavy, extra battery weight can make overhead or ladder work harder. Let a hot battery cool before charging, and stop if the drill repeatedly cuts out from heat.
Use low gear and a steady feed. Pushing harder is not a substitute for sharp cutters: excessive pressure can stall the motor, overheat the bit, or make the drill lurch when the bit breaks through. Clear chips from deep holes periodically by backing the bit out while it is still turning slowly. If the flutes pack with chips, the bit can bind and the motor has to work harder.
Pick the right auger bit
Self-feeding augers pull themselves into wood with a screw tip and remove material quickly. They are effective in framing, but that pulling action can intensify kickback, particularly in knots or wet lumber. Standard augers usually need more pressure and can be slower, but they may be easier to control in some applications. Choose a bit rated for the material, and use a wood auger rather than a masonry bit for lumber.
For boring large holes, consider wood auger bits with a 1/2-inch shank. Confirm the bit’s maximum diameter and length against the drill maker’s guidance. A larger hole is not automatically better: oversizing holes through studs can weaken framing, and plumbing or wiring penetrations may need plates or other protection. Follow local code and the project plans.
Bore safely and avoid common failures
Clamp or securely brace the work when possible, and keep the drill square to the surface. On a stud wall, check for wiring and plumbing before drilling; a stud finder is not a guarantee that the path is clear. Wear eye protection, keep loose clothing away from the rotating bit, and do not hold a small workpiece in one hand while drilling with the other.
Common trouble signs are a sudden drop in speed, a hot motor, a bit that stops advancing, or a drill body that begins to rotate. Release the trigger rather than trying to muscle through a stall. With the tool stopped, withdraw the bit, clear packed chips, inspect for a knot or obstruction, and resume with a firm grip. If the drill repeatedly stalls in the same hole, use a sharper or smaller bit, change the approach, or move to a more suitable tool.
For occasional holes under 3/4 inch, a good standard drill and sharp auger are often enough. For large diameters, deep holes, or repeated work, pay for better control before paying for a higher top speed. A drill that is comfortable to brace is more useful than one that looks powerful on a specification sheet.