What's inside
- What a mortising drill bit actually includes
- Best mortising bit by woodworking situation
- Head-to-head: common mortising chisel-and-bit choices
- Cutting depth, hardwood performance, and chip evacuation
- Machine compatibility matters more than brand
- Sharpening and ownership costs
- Setup procedure for cleaner square mortises
- Final buying recommendation
- What a mortising drill bit actually includes
- Best mortising bit by woodworking situation
- Head-to-head: common mortising chisel-and-bit choices
- Cutting depth, hardwood performance, and chip evacuation
- Machine compatibility matters more than brand
- Sharpening and ownership costs
- Setup procedure for cleaner square mortises
- Final buying recommendation
As an Amazon Associate I earn from qualifying purchases. This post may contain affiliate links at no extra cost to you.
The best mortising drill bit for most woodworking projects is a sharp, standard square-hole chisel-and-bit set sized to your mortiser’s collet and matched to the timber: use a 1/4-inch set for lighter cabinet work, 5/16-inch or 3/8-inch for general hardwood joinery, and 1/2-inch or larger only when your machine has enough power and throat capacity.
As an Amazon Associate we earn from qualifying purchases at no extra cost to you.


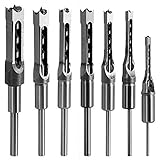
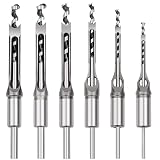
What we cover
- What a mortising drill bit actually includes
- Best mortising bit by woodworking situation
- Head-to-head: common mortising chisel-and-bit choices
- Cutting depth, hardwood performance, and chip evacuation
- Machine compatibility matters more than brand
- Sharpening and ownership costs
- Setup procedure for cleaner square mortises
- Final buying recommendation
What a mortising drill bit actually includes
A mortising bit is not a conventional twist drill. It is a two-part cutting system: an inner auger bit removes most of the waste, while a hollow square chisel cuts the four walls and corners of the mortise. The bit must sit concentrically inside the chisel, with a small amount of clearance so chips can escape without forcing the chisel outward.
For square-hole work, the chisel dimension determines the finished mortise width. The bit diameter is usually slightly smaller than the chisel’s inside opening. Buying a replacement auger based only on its nominal diameter can therefore produce poor chip clearance or an inaccurate mortise.
Best mortising bit by woodworking situation
| Situation | Recommended size or type | Why it fits | Watch out for |
|---|---|---|---|
| Small cabinet doors and light joinery | 1/4-inch chisel with matching auger | Low cutting load and clean, compact mortises | Slow feed is important in dense hardwood |
| General furniture and frame construction | 5/16-inch or 3/8-inch chisel | Good balance of strength, capacity, and machine compatibility | Requires a firmly clamped workpiece |
| Heavy doors, benches, and timber-style work | 1/2-inch to 3/4-inch chisel | Creates stronger joints and removes more material per pass | Needs a floor-standing or high-capacity mortiser |
| Occasional use on a drill press | Compatible attachment or dedicated mortising setup | Uses existing equipment where practical | Many drill presses lack the quill travel, fence, and rigidity needed |
| Very deep mortises | Longer shank and chisel set, within machine limits | Provides additional cutting depth | Do not exceed the rated stroke or exposed-bit length |
Head-to-head: common mortising chisel-and-bit choices
1/4-inch sets: best for delicate, precise joinery
A 1/4-inch mortising chisel produces a narrow square hole suited to cabinet rails, small tables, drawer components, and narrow tenons. It puts less strain on a benchtop machine and is easier to keep aligned. The limitation is strength: a narrow mortise leaves less room for a substantial tenon, and the small chip path clogs more easily in fibrous wood.
Choose a set with a stiff square chisel and a well-ground auger. A thin, flexible chisel can deflect when the machine is lowered too quickly. In hardwood, make several short plunges rather than forcing the full depth in one movement.
5/16-inch and 3/8-inch sets: the most versatile range
For many furniture makers, this is the best all-around mortising bit range. A 5/16-inch mortise works well for medium-sized frames, while a 3/8-inch mortise suits chair parts, table aprons, workbench components, and heavier doors.
These sizes balance cutting capacity with manageable power requirements. They are also commonly supported by benchtop and floor-standing mortisers, although the chisel holder, bit shank diameter, and maximum capacity vary. Check the machine manual rather than assuming that a set will fit because its square dimensions look appropriate.
1/2-inch and larger sets: capacity over convenience
A 1/2-inch mortising bit can remove a substantial amount of wood and creates a strong joint, but the cutting load rises sharply. The larger chisel needs a rigid machine, a solid fence, and a workpiece that cannot twist. A small benchtop mortiser may stall, chatter, or overheat when asked to cut a deep 1/2-inch mortise in hard maple or white oak.
Large sets make more sense on floor-standing machines such as the Powermatic PM701 or comparable heavy-duty mortisers. Confirm the machine’s published mortising capacity and spindle or chuck requirements before buying. A larger chisel is not automatically better if the surrounding stock is too narrow to support it.
Cutting depth, hardwood performance, and chip evacuation
Nominal chisel size tells only part of the story. A set also needs enough usable cutting depth for the joint. Many general-purpose sets are comfortable around 2 to 3 inches deep, while longer specialty sets may reach approximately 4 inches or more. The practical limit is lower when the machine has limited quill travel or when chips pack inside the chisel.
Hardwood performance depends on three details:
- Auger geometry: A sharp lead point and clean spiral carry chips upward instead of grinding them inside the chisel.
- Chisel relief: Ground relief behind the cutting edges reduces friction and heat.
- Clearance: The auger should not rub the chisel internally. Incorrect adjustment can make even a premium set cut poorly.
For deep mortises, plunge about 1/8 to 1/4 inch at a time, briefly retracting the tool after each plunge to clear chips. In hard maple, beech, or white oak, a slower feed and frequent chip clearing usually produce a cleaner result than simply increasing force. A sacrificial board beneath the workpiece helps prevent breakout as the chisel exits.
Machine compatibility matters more than brand
Before choosing a mortising drill bit, check four dimensions:
- Chisel shank size: The square chisel must fit the machine’s chisel holder.
- Auger shank and chuck size: The inner bit must fit the machine’s chuck or collet and must not bottom out before the chisel is correctly positioned.
- Maximum mortising capacity: The machine may accept a physically larger set than it can drive effectively.
- Available stroke and throat depth: A long set is useless if the machine cannot lower it far enough or position it over the workpiece.
Dedicated mortisers such as the Jet JBM-5 and Powermatic PM701 are designed around square chisel-and-bit work. Drill presses can sometimes accept mortising attachments, but their quill and column may have more flex, and their tables may lack a suitable fence. A drill press setup is reasonable for occasional light work only when the attachment manufacturer specifies compatibility.
Sharpening and ownership costs
The chisel corners usually show wear first, especially when the tool is pushed sideways or used in abrasive engineered board. The auger’s lead point and cutting lips are next. A practical maintenance kit includes a small mortising chisel-sharpening cone, slipstone, honing guide or suitable sharpening jig, and a small file for removing burrs.
Do not enlarge the inside of the square chisel casually. Removing too much metal changes chip clearance and can weaken the corners. Hone the outside cutting faces carefully and preserve the original geometry. The auger can be touched up with a small file or dedicated bit sharpener, but replace it when the lips are badly chipped or the lead screw no longer pulls the bit steadily.
As a simple ownership calculation, a $40 set used for 20 medium-sized projects costs about $2 per project before sharpening. If the set requires replacement after 100 projects, the consumable cost falls to roughly 40 cents per project. That makes a replaceable auger or individually available chisel valuable for frequent users, even when its initial price is higher.
Setup procedure for cleaner square mortises
- Mark the mortise and clamp the workpiece against a rigid fence.
- Insert the chisel first, leaving the manufacturer’s recommended clearance above the holder.
- Install the auger and align its cutting lips with the chisel openings.
- Set the depth stop slightly shallower than the final depth for a test cut.
- Make a test mortise in scrap from the same species and confirm the tenon fit.
- Cut the real mortise with short plunges, clearing chips regularly.
- Clean resin and dust from the auger and chisel before storage, then apply a light rust-preventive coating.
The most common mistake is setting the chisel too low or tightening it against the auger. That prevents the auger from clearing chips and creates heat, noise, and excessive resistance. The second is cutting at full depth immediately, which can tear fibers and overload a small machine.
Final buying recommendation
For a first purchase, choose a matched 5/16-inch or 3/8-inch mortising chisel-and-bit set made for your machine, preferably with a replaceable auger and clearly specified shank dimensions. Choose 1/4 inch for small cabinet joinery, 1/2 inch or larger for heavy construction, and longer sets only when the machine’s stroke and capacity support them. Sharp geometry, correct adjustment, and effective chip evacuation matter more than a premium label alone.