What's inside
As an Amazon Associate I earn from qualifying purchases. This post may contain affiliate links at no extra cost to you.
What we cover
Why stone veneer changes the drill choice
Repeated holes in stone veneer are harder on a drill and bit than occasional holes in drywall or wood. Veneer varies: some pieces are relatively soft manufactured concrete, while natural stone can be dense and uneven. You may also have mortar joints nearby, a cavity or sheathing behind the veneer, and limited room to correct a hole once it is started.
A cordless hammer drill is usually the practical choice for several holes or more. Its hammer action helps the masonry bit advance, while its clutch and variable-speed trigger help control the start. But a hammer drill is not a substitute for the right bit or a suitable anchor. Too much force, a dull bit, or drilling into the wrong part of the veneer can cause chips, wandering holes, or a cracked facing.
As an Amazon Associate we earn from qualifying purchases at no extra cost to you.

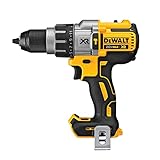


What to look for in a cordless hammer drill
For this work, prioritize control and sustained performance over the largest torque number on the box. A compact 18V or 20V-class drill is enough for many veneer anchor holes in the 1/4- to 3/8-inch range. If the job involves many holes, larger bits, or dense natural stone, a stronger drill with a side handle is easier to manage and less tiring when the bit binds.
Check that the drill has a selectable hammer mode, a two-speed gearbox, and a clutch. Start holes in low speed with light pressure, then increase speed only if the bit is cutting cleanly. A side handle is a useful safety feature on a powerful drill: masonry bits can catch suddenly, especially in an irregular stone face. If you already own compatible batteries, staying on that battery platform may be a better value than buying a different drill kit.
For frequent masonry work, compare cordless hammer drills with a side handle. A compact drill is a reasonable cheaper option for a small number of modest holes, but it may run hot or bog down in harder stone. For long runs of large holes in dense masonry, consider whether a rotary hammer is a better tool than pushing a drill beyond its comfortable range.
Choose the tool for the hole count
| Job | Practical choice | Main trade-off |
|---|---|---|
| A few small anchor holes in soft manufactured veneer | Existing drill with hammer mode, if it cuts steadily | Slower in dense stone; stop if the tool or bit overheats |
| Repeated holes around 1/4 to 3/8 inch | 18V or 20V-class cordless hammer drill | More weight and cost than a basic drill, but better pace and control |
| Many large holes or hard, dense stone | Heavy-duty hammer drill or rotary hammer suited to the bit | A rotary hammer is faster, but can be too aggressive for fragile veneer |
These are starting points, not guarantees. Stone hardness, bit quality, hole depth, and the material behind the veneer all change the workload. If you are unsure whether the facing is fragile, make a test hole in an inconspicuous spot.
Match the bit to the anchor
Use a masonry bit sized to the anchor manufacturer’s instructions; do not guess from the screw diameter. A common plastic masonry plug may call for a 1/4-inch hole, but anchor designs differ. For repeated holes, a sharp carbide-tipped bit made for hammer drilling is worth the small extra cost. A worn bit tends to polish or rub rather than cut, making the drill hotter and increasing the chance of a chipped entry.
For cleaner holes, mark the location, use a center punch only if the veneer can tolerate it, and begin without hammer action if the bit keeps skating. Once the tip is established, switch to hammer mode and keep the drill aligned. Let the bit do the work; heavy pressure can overheat it or force the hole off line. Pull the bit out periodically to clear dust, especially in deeper holes. A useful rule is to drill a little deeper than the anchor’s embedment requirement, while avoiding unnecessary depth into unknown layers behind the stone.
For bit replacements, browse carbide-tipped masonry bits for hammer drills. Check the shank: standard round-shank bits fit most three-jaw chucks, while SDS bits require an SDS tool or compatible chuck. Do not buy an SDS bit assuming it will fit a regular cordless drill.
Drill carefully and watch for trouble
Before drilling, confirm what lies behind the veneer and where the anchor is meant to hold. Veneer is often a facing, not structural material. If the fastener must carry a heavy load, use an attachment method designed for the wall assembly and anchor into the appropriate backing or framing—not just the stone facing. Avoid drilling close to an edge or corner, where the veneer is more likely to split.
Keep the drill square to the surface and use a depth stop or a piece of tape on the bit as a visual guide. A hole that is too shallow leaves the anchor proud; one that is too large or wallowed out may not grip. If the bit wanders, stop and reset rather than leaning harder. If progress stalls, check for a dull bit, packed dust, an unsuitable drill mode, or unusually hard stone. Let hot bits cool naturally; quenching them can damage the carbide tip.
Wear eye protection and a suitable dust mask, and keep dust away from the drill’s vents. Stone and mortar dust are abrasive and can be hazardous to breathe. For one or two small holes in soft veneer, a basic hammer drill you already own may be perfectly adequate. For repeated holes, a controllable cordless hammer drill, sharp masonry bits, and a correctly chosen anchor make the work more predictable—and reduce the chance that a rushed hole ruins the facing.