What's inside
As an Amazon Associate I earn from qualifying purchases. This post may contain affiliate links at no extra cost to you.
What we cover
What matters for cabinet face-frame screws
Installing cabinets is a precision fastening job, not a contest to see which driver can make the most torque. Face-frame screws pull one cabinet frame tight to the next, often through hardwood or plywood. An impact driver can do that quickly, but its hammering action makes it easier to overdrive a screw, strip a head, or split a narrow stile than it is with a clutch-equipped drill.
For most cabinet work, choose a compact 18V or 20V impact driver with variable-speed control and a comfortable low-speed trigger. A 12V driver is also capable and often easier to handle inside a cabinet. Maximum torque matters less than control: even modest drivers can snap a cabinet screw if you lean on the trigger after the head seats.
As an Amazon Associate we earn from qualifying purchases at no extra cost to you.

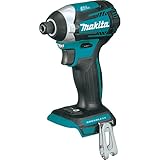
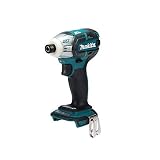

Use a purpose-made cabinet screw with a suitable washer or trim head, not a drywall screw. Drywall screws are brittle and their bugle heads can damage the frame. Check the screw maker’s guidance for the required pilot-hole diameter and length. A typical face-frame installation uses screws around 2 1/2 inches long, but the right length depends on frame thickness and how much material the screw must enter without poking through.
Driver options compared
| Option | Best for | Trade-off |
|---|---|---|
| Compact 12V impact driver | Light cabinets, confined spaces, occasional installations | Less runtime and power reserve than most 18V kits |
| Compact 18V/20V impact driver | Regular installation work and longer screws | More weight; still requires a careful trigger hand |
| Drill/driver with clutch | New users, delicate frames, predictable screw depth | Slower, and may stall or need a pilot hole in dense wood |
If you already own a compatible battery platform, the least expensive sensible choice is often a bare tool from that platform. For a first purchase, compare kits that include a small battery; a large pack can make a compact tool awkward when working inside a cabinet. Browse compact 12V impact driver kits if low weight and access matter most, or compact 18V impact driver kits for a more versatile shop tool.
Features worth paying for
A speed selector or dedicated low-speed mode is useful, but it does not replace trigger control. Some drivers also offer assist modes that reduce speed near the end of a fastening cycle. These can help, though their behavior varies by tool and screw. Try the setting on scrap before trusting it on finished cabinets.
Look for a short head length, a clear work light, and a belt hook if you work on a ladder or carry the tool between cabinets. A standard 1/4-inch hex collet accepts common driver bits. Keep a fresh, correctly sized bit in the collet; a worn or undersized bit is more likely to cam out and chew up the screw head than a lack of raw power is.
Brushless motors can improve efficiency and runtime, but a brushed driver is adequate for occasional installations if it has controllable speed and the right battery platform. Do not pay extra for a high-torque model just for cabinet screws. The extra output offers little advantage here and can make mistakes more costly.
How to drive the screws cleanly
First, clamp the face frames flush. A face-frame clamp keeps the joint aligned and gives the screws less work to do. Check that the cabinet boxes are level and plumb before fastening; screws should secure an aligned installation, not pull a crooked run into shape.
Predrill where the screw maker recommends, especially in hardwood, near a stile end, or when a test screw causes the wood to split. A pilot hole reduces splitting and lowers the force needed to drive the screw. Keep the hole centered and avoid drilling through the mating frame. A countersink or clearance hole may be appropriate for the screw design, but do not remove so much material that the head loses its bearing surface.
Set the driver to low speed, hold the bit square to the screw, and start with a steady trigger pull. Ease off as the head approaches the frame. Stop when it is seated firmly; sinking the head below the surface can crush the wood fibers or leave a visible divot. If the tool begins hammering hard before the screw is seated, release the trigger and check the pilot hole, bit engagement, and screw alignment rather than forcing it.
Drive one screw, inspect the joint, and adjust your technique before repeating across the run. If you strip a head, stop before the bit damages the frame. A screw extractor or locking pliers may help, but prevention is easier: use a new screw, a fresh bit, and enough clamp pressure to keep the frames from shifting.
When a drill/driver is the better buy
If this is a one-time kitchen project, a drill/driver with an adjustable clutch may be the safer purchase. Set the clutch low and increase it only until the screw seats reliably on scrap. The clutch can limit overdriving, although long screws in dense hardwood may still require a pilot hole or a higher setting. A drill also handles pilot holes without changing tools if you have a two-tool setup or a quick-change bit system.
An impact driver makes more sense for repeated fastening, long screws, or a tool collection where the battery platform is already established. For close-up finish work, control matters more than speed. A cabinet face-frame screw set matched to the installation is at least as important as the driver: the right head and length help prevent pull-through, splitting, and protruding tips.