What's inside
As an Amazon Associate I earn from qualifying purchases. This post may contain affiliate links at no extra cost to you.
Fence pickets are light work for an impact driver, but the right setup matters more than headline torque. A driver that is too powerful or poorly controlled can snap screw heads, split dry boards, or bury fasteners below the surface. For a typical backyard fence, prioritize a variable-speed trigger, a comfortable grip, and a battery that will last through the run of pickets.
As an Amazon Associate we earn from qualifying purchases at no extra cost to you.



What we cover
What to buy for fence pickets
A standard 1/4-inch hex impact driver is the practical choice for driving exterior-rated screws into wood rails. A compact 12-volt model can handle ordinary pickets; an 18- or 20-volt model is a better all-around buy if you also drive longer structural screws or already own batteries in that platform. You do not need a premium high-torque model just to fasten pickets.
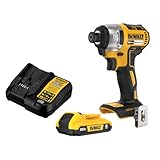
For a first tool, compare a cordless 18-volt impact-driver kit with a compact 12-volt kit. Kits usually include a battery and charger, which makes their total cost more meaningful than the bare-tool price. If you already have compatible batteries, a bare-tool impact driver may be the cheaper option.
| Option | Best for | Trade-off |
|---|---|---|
| 12-volt impact driver | One fence project, lighter handling, standard picket screws | Less reserve for long screws or repetitive heavy work |
| 18- or 20-volt impact driver | Long fences, mixed home projects, driving into dense lumber | Often heavier and more tool than pickets alone require |
| Drill/driver | Occasional screws where careful speed control matters | Can be slower on long fasteners and may stall more readily |
Choose screws and bits for outdoor use
Use exterior-rated deck or fence screws, not drywall screws. Drywall screws are brittle and can snap under the twisting load of installation; they also are not made for weather exposure. For a typical 5/8-inch picket attached to a 1-1/2-inch rail, screws around 1-5/8 to 2 inches long are common. The screw should pass through the picket and get solid purchase in the rail without unnecessarily protruding out the back. Check the actual thickness of your lumber before choosing.
Use the bit that matches the screw head—often a star-drive bit—and keep a spare nearby. A worn or mismatched bit cams out, chews up the recess, and can leave a screw partly driven. A small impact-rated driver bit set is useful if the screw maker specifies a particular size or you need a replacement mid-job. “Impact-rated” bits are designed for the repeated shock of an impact driver; ordinary bits can break sooner.
Set the driver and drive consistently
Start on the lowest speed or assist setting if your driver has one. Hold the bit square to the screw, begin slowly, then increase pressure as the screw bites. Stop when the head is snug and flush with the face of the picket. Driving until the driver hammers for several extra beats can strip the recess, crush the wood fibers, or pull the head below the surface.
Make a test fastening on a scrap piece of the same picket and rail material. If the screw stalls or the board splits, adjust before installing a full row. Near a board end, leave some distance between the screw and edge; dry, narrow pickets are especially prone to splitting. Predrilling can help in those cases: use a drill bit slightly smaller than the screw’s solid shank, and drill through the picket where the screw will go. It takes longer, but can prevent a cracked board and makes placement easier.
For predictable spacing, use a spacer block between pickets and mark or sight a consistent line for screw height. Put two screws into each rail crossing, spaced apart across the picket’s width. One screw may let a board twist as it dries or moves; two help keep it flat. Avoid overtightening: a deeply buried head leaves a water-catching divot and weakens the wood around the fastening.
When a drill is the better choice
An impact driver is quick and effective, but it is not automatically the best tool for every fence. A drill/driver gives smoother control and is often easier for delicate, brittle, or very dry pickets. It can also drill pilot holes without changing tools. If you already own a drill and are installing a modest number of boards, using it on a low clutch setting is a reasonable way to avoid buying another tool. The downside is that long screws may be slower, and a drill can twist your wrist if it binds.
Do not use a hammer drill’s masonry mode for wood screws. That setting is for drilling into masonry with the appropriate bit; it does not improve fence fastening. If you have a hammer drill with a normal drill-driver mode, that mode can drive screws, but the hammer function should be off.
Match the battery to the fence
For a short repair, a compact battery is usually enough. For a long fence, a second battery helps prevent interruptions and lets one pack charge while the other is in use. Battery runtime varies with screw length, wood hardness, temperature, and how often the driver is allowed to hammer after seating. Bring a charger to the work area if the job will take most of the day, and keep batteries out of direct sun when possible.
Expect occasional snags: a screw can hit a knot, a bit can wear, or a picket can split. Back out a stubborn screw rather than leaning harder until the bit slips. Replace damaged screws and worn bits, and keep the driver aligned with the fastener. For most picket work, steady control and weather-resistant screws will prevent more problems than buying the most powerful driver on the shelf.