What's inside
As an Amazon Associate I earn from qualifying purchases. This post may contain affiliate links at no extra cost to you.
A masonry bit set is worth buying when it covers the hole sizes your anchors actually require and fits the drill you own. For typical plastic plugs and small concrete screws, a basic carbide-tipped set can do the job. Larger holes, frequent drilling, or reinforced concrete make bit quality and drilling method more important than the number of pieces in the case.
As an Amazon Associate we earn from qualifying purchases at no extra cost to you.



What we cover
Match the bit to the anchor
Start with the anchor maker’s instructions. The stated drill size is the hole diameter, not the anchor’s outside diameter in every case. A common plastic plug may call for a 1/4-inch hole; a sleeve anchor might require 3/8 inch or more. Follow the specified diameter rather than choosing a bit that looks close. An oversized hole can leave an anchor spinning or pulling out, while an undersized hole can prevent the fastener from seating.
Also check required hole depth. For many anchors, the hole must be deeper than the portion of the fastener that enters the wall, leaving room for dust. If you drill only to the anchor’s exact length, debris can pack at the bottom and stop it short. Mark the bit with tape or use a depth stop, and verify the measurement against the anchor instructions.
Which set to buy
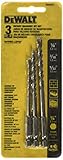
For occasional indoor work in brick or ordinary concrete, a small set with the anchor sizes you need is usually enough. Look for carbide tips, clear size markings, and round shanks compatible with your drill. A set of five to eight useful diameters beats a large assortment full of sizes you will never use. A carbide-tipped masonry bit set is the budget-friendly starting point for light installation work.
For repeated holes or harder concrete, consider bits with a more durable carbide head and a shank suited to your hammer drill. SDS-Plus bits are designed for SDS-Plus rotary hammers; they do not fit ordinary three-jaw chucks. Some SDS shanks are usable in compatible rotary hammers only, so check the tool manual before buying. A SDS-Plus bit set makes sense if you already own that tool and drill concrete regularly.
| Set type | Best fit | Trade-off |
|---|---|---|
| Basic carbide-tipped, round shank | Occasional holes for plugs and light-duty anchors | Slower in hard concrete; tips may wear or overheat with heavy use |
| Premium carbide-tipped, round shank | Frequent drilling with a hammer drill that takes round-shank bits | Costs more, but can stay productive longer under repeated use |
| SDS-Plus masonry set | Rotary-hammer owners drilling concrete regularly | Requires a compatible SDS-Plus tool; unnecessary for a few small holes |
Choose the right drill
A cordless drill with hammer mode can handle small holes in brick and many concrete surfaces, especially with a sharp bit and a patient pace. A regular drill without hammer action may work in softer masonry, but it is slow in concrete and can polish the hole instead of cutting it. For multiple holes around 3/8 inch or larger, or for hard concrete, a rotary hammer is usually faster and puts less pressure on your arms.
Do not assume an impact driver is a substitute. Its rapid rotational impacts are intended to drive fasteners, not to make clean masonry holes. Use a drill or rotary hammer with the correct chuck and bit. For occasional work, renting a rotary hammer can be cheaper than buying one; for two small holes in brick, a hammer drill is often the more practical choice.
Drill clean and straight
Before drilling, check for hidden wiring and plumbing, and avoid drilling near edges unless the anchor’s instructions permit it. Mark the hole, hold the drill perpendicular to the surface, and start at low speed with the bit tip steady. Once the bit has made a shallow guide, use hammer mode if the material and drill call for it. Let the bit cut; leaning hard on the tool can overheat it, wear the carbide, or make the hole wander.
Pull the bit out periodically to clear dust, especially in deeper holes. Vacuum or blow out the hole when finished, using eye protection and following the anchor maker’s cleaning instructions. Dust left inside can keep an adhesive anchor from bonding or prevent a mechanical anchor from seating properly. If the bit stops advancing, do not keep forcing it: withdraw it, clear dust, and check whether it has reached a hard aggregate or metal reinforcement. If you suspect rebar, stop and reassess the hole location rather than trying to force through it.
Common buying mistakes
Buying a set because it contains 20 or 30 pieces is not a reliable way to judge it. Check that the needed diameters are included, the markings are readable, and the shanks fit your drill. A cheap set is fine for a few small holes in brick or softer block. It is a poor bargain if you need many holes in dense concrete and end up replacing dull bits or damaging anchors.
Another mistake is using a worn bit because it still looks intact. A blunt tip drills slowly, wanders, and can leave an irregular hole that compromises the anchor. If drilling takes much longer than it did on the first holes, or the bit gets unusually hot, stop and inspect it. Replace a damaged or badly worn bit rather than compensating with more pressure. Buy for the actual anchor sizes and material, not for the biggest assortment in the aisle.