What's inside
As an Amazon Associate I earn from qualifying purchases. This post may contain affiliate links at no extra cost to you.
The safest answer is that standard router bits do not belong in a handheld drill: use them in a router with a matching collet, while a drill should be reserved for twist bits, brad-point bits, Forstner bits, hole saws, and other tools designed for axial cutting.
That distinction matters because a drill produces torque around a chuck but is not designed to control the sideways force created when a cutter meets an edge. Its chuck can also loosen under side loading, and many drills run too slowly for a clean router cut. A drill press is more rigid, but it still is not a substitute for a router unless a cutter’s instructions specifically approve that use.
As an Amazon Associate we earn from qualifying purchases at no extra cost to you.


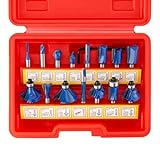
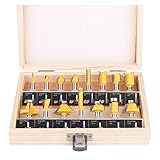
What we cover
What to buy instead of putting a router bit in a drill
For edge work, choose a fixed-base or plunge router with a 1/4-inch collet for small bits, or a 1/2-inch collet for larger cutters. Combination routers commonly accept both sizes through separate collets. The collet must match the shank exactly; a 1/2-inch bit cannot safely be reduced to 1/4 inch with an improvised sleeve.
Compact routers are convenient for trimming laminate, easing edges, and cutting shallow profiles. A full-size router is preferable for deep grooves, raised panels, large roundovers, and continuous work in hardwood. If your project only requires drilling holes, buy drill bits rather than router drill bits—the latter is an informal phrase that often causes the wrong tool to be selected.
Router bit types matched to the job
| Bit type | Typical cutting diameter | Useful cutting depth | Best materials | Suitable machine |
|---|---|---|---|---|
| Straight bit | 1/4–3/4 in (6–19 mm) | 1/8–1 in (3–25 mm), in multiple passes | Softwood, hardwood, plywood, MDF, plastic laminate | Router; not a handheld drill |
| Flush-trim bit | 1/4–1/2 in (6–13 mm) | Usually 1/2–1 in (13–25 mm) | Plywood, solid wood, laminate, templates | Router with bearing correctly positioned |
| Roundover bit | 1/8–1/2 in radius (3–13 mm) | Set by bearing and profile | Solid wood, plywood edges, some MDF | Router; shallow passes on small routers |
| Chamfer bit | 1/4–1 in chamfer (6–25 mm) | Typically up to 1/2 in per pass | Hardwood, softwood, plywood | Router |
| V-groove bit | 1/4–3/4 in (6–19 mm) | 1/8–3/8 in (3–10 mm) per pass | Wood, MDF, sign boards | Router, often with a guide |
| Drill bit or Forstner bit | 1/8–2 in (3–51 mm), depending on type | Depends on flute length and workpiece | Wood, plywood, MDF; some versions suit plastics | Handheld drill or drill press |
The figures are practical ranges rather than universal limits. Always reduce the depth for hard stock, narrow workpieces, interrupted cuts, and small routers. A bit’s maximum advertised capacity is not a recommendation to remove that much material in one pass.
Shank size and cutting depth: the safety decisions
A 1/2-inch shank is stiffer than a 1/4-inch shank and generally produces less vibration when the cutter is large, the profile is deep, or the material is hard. That does not make it automatically safer in every router: the collet, motor, and base must all be rated for the bit. Use the largest compatible shank for substantial work, and keep at least 3/4 of the shank length inserted into the collet without bottoming it out.
For example, if a 1/4-inch-shank bit has a 1-inch insertion length, aim for roughly 3/4 inch of engagement while leaving a small clearance from the bottom of the collet. Tighten the collet with the supplied wrenches, not by holding the armature or relying on hand pressure.
Cutting depth affects both safety and finish. Removing 1/2 inch in one pass can overload a compact router, burn the edge, or pull the tool into the work. Three passes of about 1/8 to 3/16 inch are usually more controllable. On a plunge router, lock each depth before starting; on a fixed-base router, make a test cut in scrap before routing the actual piece.
Which materials can these bits handle?
- Softwood: Most carbide-tipped router bits work well, but resinous species can load the cutters and cause burning. Clean pitch from the bit rather than increasing feed pressure.
- Hardwood: Use sharp carbide cutters, a slower feed when the profile is large, and shallow passes. Dense woods punish dull bits quickly.
- Plywood: Flush-trim and straight bits are useful, but exposed glue lines can dull edges. Support thin sheets to prevent vibration.
- MDF: It cuts easily but creates fine abrasive dust. Carbide lasts longer than high-speed steel, and dust extraction is especially valuable.
- Plastic laminate: A flush-trim bit or laminate-trimming bit is appropriate. Take light passes and avoid dwelling in one spot, where heat can melt the edge.
- Solid-surface material: Use manufacturer-approved carbide tooling and dust control. Some materials require particular speeds and feed rates.
- Metal: Ordinary woodworking router bits are not metal-cutting tools. Use a cutter specifically designed for the alloy and machine.
Carbide-tipped bits are the normal choice for woodworking. Solid-carbide bits can be precise and durable but are more brittle if dropped or forced into a knot. High-speed steel bits are economical for occasional softwood work, but they lose their edge sooner in plywood, MDF, and hardwood.
Decision guide by project and experience
| Your situation | Recommended choice | Why |
|---|---|---|
| First edge-profile project | 1/4-inch-shank carbide roundover or chamfer bit | Small profile, easier depth control, generally lower cost |
| Frequent hardwood furniture work | Router accepting 1/2-inch shanks plus quality carbide bits | Lower vibration and better support for large profiles |
| Small shop with limited storage | Compact router and a 6–8 bit starter set | Covers trimming, straight cuts, roundovers, and chamfers |
| Occasional laminate repair | Compact router with a flush-trim or laminate bit | More controlled than trying a router bit in a drill |
| Only making holes | Brad-point, Forstner, or hole-saw set for a drill | These tools are designed for axial drilling and chuck use |
A safer setup for clean edge cuts
- Inspect the bit. Reject cutters with chipped carbide, a bent shank, a loose bearing, or visible resin buildup.
- Secure the work. Clamp it so the router cannot move the board. Do not hold a small workpiece in one hand while routing with the other.
- Set the depth in scrap. Start with a shallow cut and confirm the profile, bearing contact, and grain direction.
- Set the speed according to diameter. Small bits can run faster; large bits need lower speed. Follow the bit and router manufacturer’s chart rather than guessing.
- Feed against the cutter’s rotation. On a typical outside edge, this is conventional routing. Climb cuts can grab the work and should be reserved for controlled specialist use.
- Make multiple passes. Reduce the depth until the motor maintains a steady sound and the chips clear without scorching.
- Finish and inspect. Let the bit stop completely before setting the router down, then check the edge for burn marks, tear-out, and bearing movement.
Ownership costs and common mistakes
Router bits wear first at the cutting edges and bearing. A small carbide bit may cost roughly $15–$35, while large, premium-profile, or solid-carbide bits commonly range from $40 to more than $100. A practical six-bit set may cost about $60–$180, depending on construction and brand. Replacing a noisy or seized bearing is usually cheaper than replacing a damaged workpiece, but not every bearing is worth rebuilding.
Clean resin with a bit cleaner approved for carbide, dry the cutter, and apply only the lubricant recommended for its bearing. Do not use a wire wheel on carbide edges. Store bits so they cannot knock against one another, and use a magnifier to check for small chips.
The most common errors are using a router bit in a drill, gripping too little shank, cutting too deeply, routing without clamping, and feeding too slowly until the edge burns. If a drill is the only powered tool available, choose a drill-specific cutter and limit the job to drilling or boring. For a clean decorative edge, the correct purchase is a router and a properly sized router bit—not a drill router bit workaround.
Bottom line
Choose the bit profile for the edge or groove, the shank size for the router and workload, and the cutter material for the stock. Use 1/4-inch carbide bits for light trimming and beginner-friendly profiles, 1/2-inch bits for larger or repeated hardwood work, and drill-specific bits when the task is actually making a hole. That combination delivers cleaner cuts and avoids the instability of putting router bits for a drill into a machine that was never designed for them.