What's inside
- Sand Drill Bits: Which Abrasive Bits Work for Woodworking?
- Choose the shape for the woodworking task
- Grit: balance removal with scratch control
- Pick by material, experience, and how often you’ll use it
- Material limits and safe setup
- A controlled setup prevents most mistakes
- What wears first—and how to extend useful life
- Sand Drill Bits: Which Abrasive Bits Work for Woodworking?
- Choose the shape for the woodworking task
- Grit: balance removal with scratch control
- Pick by material, experience, and how often you’ll use it
- Material limits and safe setup
- A controlled setup prevents most mistakes
- What wears first—and how to extend useful life
As an Amazon Associate I earn from qualifying purchases. This post may contain affiliate links at no extra cost to you.
What we cover
- Sand Drill Bits: Which Abrasive Bits Work for Woodworking?
- Choose the shape for the woodworking task
- Grit: balance removal with scratch control
- Pick by material, experience, and how often you’ll use it
- Material limits and safe setup
- A controlled setup prevents most mistakes
- What wears first—and how to extend useful life
Sand Drill Bits: Which Abrasive Bits Work for Woodworking?
The best sand drill bit for woodworking is a rubber-backed sanding drum for flat curves and inside edges, a small flap wheel for gentle contouring, or a pointed abrasive bit for narrow grooves; choose the shape to match the profile, then use the finest grit that removes material at a controlled pace.
These bits are for sanding small areas a hand-held sheet or sanding block cannot reach—not for removing large amounts of stock. Most mount in a drill or rotary tool, and some are sold with interchangeable sleeves or abrasive bands. A “sand paper drill bit” is usually a sanding drum or mandrel fitted with a replaceable abrasive sleeve, rather than a special kind of sandpaper.
As an Amazon Associate we earn from qualifying purchases at no extra cost to you.
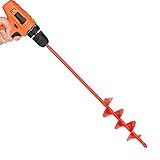

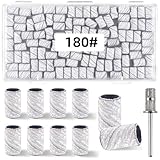

Choose the shape for the woodworking task
| Bit shape | Typical working size | Best use | Main limitation |
|---|---|---|---|
| Rubber sanding drum | 1/2- to 1-inch diameter; 1/2- to 1-inch sleeve length | Inside curves, cutouts, rounded edges, and small flat areas | Can round over edges or enlarge a curve if tilted or held in one spot |
| Small sanding drum | 1/8- to 1/4-inch diameter | Tight radii, narrow openings, and detail work on small parts | Small sleeves wear quickly and can leave uneven scratches |
| Flap wheel | 1/2- to 1-inch diameter | Softly blending contours and sanding irregular surfaces | Less precise than a drum; flexible flaps can soften crisp corners |
| Pointed or cone abrasive bit | Tip commonly 1/8- to 1/4-inch wide | Grooves, corners, and narrow recesses | Concentrated pressure makes gouges and heat marks more likely |
| Mounted abrasive stone or rotary sanding point | Often 1/8- to 1/4-inch diameter | Very small details or abrasive work on compatible hard materials | Many stones are intended for metal or masonry, not wood; check the maker’s material rating |
Sizes above are common working ranges, not guarantees that a bit will fit a particular tool. Check the shank diameter, tool collet or chuck capacity, and the bit’s stated maximum speed before buying. For wood, an abrasive sleeve on a drum or a purpose-made sanding point is usually a better starting choice than a grinding stone.
For inside curves and cutouts
Choose a drum that is narrower than the opening and close to the curve’s radius. A drum that is too large cannot follow a tight curve; one that is too small touches the wood over a tiny area and is easier to steer into a divot. A rubber drum holds the sleeve in place and can be reused when the abrasive wears out.
For contours and blended edges
A flap wheel conforms more readily than a rigid drum, which helps blend a curved transition. That flexibility is also the trade-off: it can round a sharp shoulder or change a profile if pressed into it. Use a light touch and keep the wheel moving.
For grooves and narrow recesses
Use a slim drum or pointed abrasive bit that fits the recess without rubbing its sides. A pointed tip is useful for a small corner, but it concentrates force at the tip. Work in short passes and inspect frequently rather than trying to sand the entire recess in one pass.
Grit: balance removal with scratch control
| Grit range | Use on wood | What to expect |
|---|---|---|
| 60–80 | Removing saw marks or correcting a rough cut in an area that needs substantial shaping | Fast cutting; leaves scratches that need further sanding |
| 100–120 | General shaping and smoothing after coarse work | Moderate removal with less aggressive scratches |
| 150–180 | Refining a profile or preparing a small area for finish sanding | Slower removal and a smoother surface |
| 220 and finer | Light finishing between broader sanding steps | Little shaping; can clog quickly on resinous wood or finish residue |
Grit numbers are a useful guide, but the abrasive material, backing, and sleeve quality also affect how a bit cuts. Aluminum oxide is a common general-purpose abrasive for wood. For a damaged profile, start with the least aggressive grit that will correct it, then step up through finer grits. For example, moving from 80 to 120 to 180 is more reliable than jumping directly from a deep 60-grit scratch to 220.
Do not expect a small drill-mounted bit to produce a finish-ready surface across a large area. Its contact pattern and tool movement can leave swirl marks. Use it to reach or shape the detail, then hand-sand the visible area with the matching grit direction before applying finish.
Pick by material, experience, and how often you’ll use it
| Your situation | Practical choice | Why |
|---|---|---|
| Occasional hobby use; only a few profiles | Basic rubber drum with replaceable sleeves, in a size that matches the work | Low-cost setup; worn sleeves can be replaced without discarding the mandrel |
| New to powered detail sanding | Medium-size drum, 120-grit sleeve, and variable-speed tool | The larger contact area is easier to control than a tiny point; moderate grit reduces aggressive cutting |
| Frequent work on several curve sizes | Drum set with multiple diameters and replacement sleeves in several grits | Better shape matching reduces over-sanding and repeated hand cleanup |
| Very tight corners or narrow grooves | Small drum or rated pointed sanding bit, used at low speed | Fits restricted areas, but demands lighter pressure and more frequent checks |
| Delicate, crisp molding details | Hand sanding with a shaped block or folded abrasive paper | Provides more control and is less likely to erase a sharp edge |
If buying a kit, compare the range of useful drum diameters, sleeve availability, shank size, and included grits—not just the number of pieces. A large assortment is of little value if its smallest drum will not enter the work or its sleeves cannot be replaced. For a compatible rotary tool, check whether the shank matches the collet; a drill chuck may accept larger shanks but can be less convenient for very small bits.
Material limits and safe setup
Wood, plywood, and many wood composites can be sanded with suitable abrasive sleeves, but dense material and glue lines may wear abrasives faster. Resinous woods can clog sleeves. Clean a reusable sleeve only with a method approved by its maker; if the grit is worn smooth, the backing is torn, or the sleeve no longer grips the drum securely, replace it.
Do not assume that a bit sold as a “sanding stone” is intended for wood. Bonded abrasive stones are often designed for other materials and may cut wood poorly, burn it, or have a speed rating unsuitable for a drill. Follow the bit manufacturer’s material and maximum-RPM guidance. Never use a damaged sleeve or loose mandrel, and disconnect the tool before changing accessories.
A controlled setup prevents most mistakes
-
Secure the workpiece. Clamp small parts so they cannot spin or jump when the bit catches an edge.
-
Fit the bit and check clearance. Confirm the shank is properly held, the sleeve is tight, and the bit can reach the target without striking nearby surfaces.
-
Start at a low speed. Test on scrap of the same wood. Increase speed only if the bit cuts smoothly and the manufacturer’s limit allows it.
-
Use light pressure and keep moving. Let the abrasive do the work. Pausing in one spot can create a hollow, heat, or burn mark—especially with a small pointed bit.
-
Check the profile often. Stop, clear the dust, and compare the shape with the surrounding edge. A few short passes are easier to correct than one long pass.
-
Finish by hand where appearance matters. Match the abrasive direction and grit to the next sanding step so the powered detail work does not leave visible scratches.
Wear eye protection and manage dust with extraction or suitable respiratory protection. Fine wood dust is easily airborne, particularly when sanding with a fast rotary tool. Keep loose clothing and hair clear of rotating accessories.
What wears first—and how to extend useful life
On a drum setup, the sleeve usually wears or clogs before the mandrel. Inspect it for polished, blunt grit, torn edges, and slipping; a sleeve that has shifted can sand unevenly or expose the drum. Flap wheels gradually lose their sharp cutting action as their abrasive flaps wear. Replace consumables once they stop cutting cleanly rather than pressing harder, which adds heat and reduces control.
Keep sleeves organized by grit and diameter, and avoid mixing coarse and fine abrasives on the same work area without clearing away coarse dust. A stray coarse grain can leave a scratch deeper than the finer sleeve can remove quickly.
Bottom line: For most woodworking detail jobs, start with a replaceable-sleeve rubber drum in the size that matches the curve, plus 120- and 180-grit sleeves. Add a flap wheel for gentle contours or a narrow pointed bit only when the profile requires it. If the detail is crisp, fragile, or visible in the finished piece, hand sanding may be the more accurate choice.