What's inside
- How to Sharpen Planer Blades: Methods, Tools, and When to Replace Them
- First, identify the blade you have
- Hand sharpening vs. powered sharpening
- How to sharpen a planer blade by hand
- When powered sharpening makes sense
- Sharpen or replace? Use the damage and workload
- Signs the edge needs attention
- Bottom line
- How to Sharpen Planer Blades: Methods, Tools, and When to Replace Them
- First, identify the blade you have
- Hand sharpening vs. powered sharpening
- How to sharpen a planer blade by hand
- When powered sharpening makes sense
- Sharpen or replace? Use the damage and workload
- Signs the edge needs attention
- Bottom line
As an Amazon Associate I earn from qualifying purchases. This post may contain affiliate links at no extra cost to you.
What we cover
- How to Sharpen Planer Blades: Methods, Tools, and When to Replace Them
- First, identify the blade you have
- Hand sharpening vs. powered sharpening
- How to sharpen a planer blade by hand
- When powered sharpening makes sense
- Sharpen or replace? Use the damage and workload
- Signs the edge needs attention
- Bottom line
How to Sharpen Planer Blades: Methods, Tools, and When to Replace Them
For most straight planer knives, sharpening planer blades is worthwhile when the edge is uniformly dull or lightly nicked; replace a blade if it is cracked, badly chipped, too short for the cutterhead, or too worn to hold the maker’s specified edge. Choose hand sharpening for occasional maintenance and control, or a powered sharpener when you need repeatable bevels on multiple knives and can manage its setup and heat.
First, identify the blade you have
“Planer blade” can mean a long, straight knife in a jointer or thickness-planer cutterhead, or one of many small indexable inserts in a helical head. The methods below apply to straight knives. Carbide inserts are generally indexed to a fresh edge or replaced, rather than sharpened with ordinary stones; follow the cutterhead maker’s instructions.
As an Amazon Associate we earn from qualifying purchases at no extra cost to you.
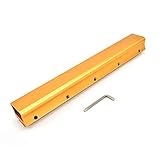


Check the machine manual before removing knives. It specifies the knife type, bevel geometry, projection or setting method, and minimum usable length. Some straight knives are reversible; others are sharpened only on the bevel. Don’t assume a blade’s material or angle from appearance alone.
Hand sharpening vs. powered sharpening
| Method | Typical setup time | Useful abrasive or equipment | Best fit | Edge and main trade-off |
|---|---|---|---|---|
| Hand honing in a guide | About 10–20 minutes to set up; often 20–45 minutes per knife for light maintenance | Flat diamond plate or waterstone, honing guide, marker | One or two high-speed-steel (HSS) knives; low-cost, occasional work | Can produce a fine, controlled edge; slow and easy to round the bevel or make it uneven without a guide |
| Dedicated planer-knife sharpener | About 20–45 minutes for alignment and setup | Knife-length grinding carriage and suitable wheel or abrasive | Repeated sharpening of straight knives when the machine supports their length and material | Consistent bevel and edge across the knife; higher purchase cost and careful setup required |
| Bench grinder or belt sander | About 10–20 minutes to prepare; very quick material removal | Appropriate wheel or belt, firm rest, cooling water | Rough repair by an experienced sharpener, not routine precision sharpening | Can remove damage fast, but heat, unevenness, and loss of straightness are common risks |
| Sharpening service | Time to package or drop off; turnaround varies | Professional grinder matched to knife length and steel | Long knives, significant nicks, or owners without suitable equipment | Often the most reliable route to a straight, consistent edge; involves transport cost and downtime |
Times are planning estimates, not manufacturer specifications. Knife length, damage, sharpening skill, and equipment affect them substantially.
Choose by steel and sharpening angle
HSS is common in traditional straight knives and can be honed with quality diamond or waterstone abrasives. Carbide is harder and more brittle; use abrasives and equipment intended for carbide, or have the knives sharpened by a service equipped for it. A standard bench stone may remove carbide very slowly.
There is no safe universal bevel angle for every planer knife. Use the angle specified by the machine or knife manufacturer; straight knives commonly fall in the approximate 25–40° range, but that range is not a substitute for the manual. Keep the existing bevel if its geometry is sound. Changing the angle can weaken the edge, alter clearance, or make the knife incompatible with its setting system.
How to sharpen a planer blade by hand
-
Make the machine safe. Disconnect power, remove the knives as directed, and wear cut-resistant gloves while handling them. Protect the edge during transport; never leave a knife loose on the bench.
-
Inspect and clean. Remove pitch and resin with a cleaner suitable for the blade. Check for cracks, deep chips, corrosion, and uneven wear. If a crack is present, replace the knife rather than trying to sharpen it away.
-
Set the angle. Use a honing guide or a fixture that holds the knife securely at the specified bevel. Color the bevel with a marker; a few strokes will show whether the abrasive is contacting the whole bevel or just its tip.
-
Hone evenly. Use a flat abrasive, starting with a coarser grit only if needed to remove a small nick, then progress to a finer grit. Keep pressure even and work along the edge without rocking the blade. Avoid removing more steel than necessary.
-
Remove the burr and check straightness. Lightly deburr the flat side without rounding the cutting edge. Inspect the full length under good light. A consistent edge should not show isolated bright dull spots, but a mirror finish is not required.
-
Reinstall and set carefully. Clean the knife and cutterhead seat, then use the maker’s specified setting gauge and tightening sequence. Unequal knife height can cause ridges, vibration, or uneven cuts even when the edges are sharp.
When powered sharpening makes sense
A dedicated planer-knife sharpener is the more dependable powered option for repeated work because its carriage can hold a long knife at a consistent angle. Confirm its maximum knife length, supported bevel angle, and compatibility with HSS or carbide before buying. Wheel condition, carriage alignment, and secure clamping matter as much as motor power.
A bench grinder or belt sander is tempting because it is already in many workshops, but it is easy to overheat a thin knife. Excess heat can damage the steel’s temper; grinding pressure can also create dips that leave lines in the workpiece. If using powered equipment, make light passes, keep the blade cool as appropriate for the equipment, and stop if the steel changes color. Don’t quench a hot blade unless the manufacturer’s process permits it.
Sharpen or replace? Use the damage and workload
| Your situation | Practical choice | Why |
|---|---|---|
| One HSS knife set, occasional hobby use, limited budget | Hand hone or use a sharpening service | A guide and flat abrasive cost less than a dedicated machine; the service avoids a learning curve for long knives |
| Several straight knives sharpened regularly, enough bench space | Consider a dedicated knife sharpener | Setup takes time, but repeatable alignment becomes valuable across multiple knives |
| Small, isolated nick and plenty of usable blade length | Sharpen, removing only enough material to restore a continuous edge | Minor damage can often be corrected without sacrificing much knife life |
| Crack, deep chip, severe rust, or blade below its minimum length | Replace | Sharpening cannot restore structural integrity or safe compatibility with the cutterhead |
| Carbide insert is dull or chipped | Rotate to a fresh edge or replace as the cutterhead manual directs | Insert geometry and fasteners are system-specific; ordinary hand honing is not an appropriate shortcut |
Compare the real cost, not just the tool price
For a simple ownership check, divide the cost of a sharpening setup by the number of sharpening jobs you expect to do, then add abrasive or service costs. For example, if a suitable setup costs $300 and you sharpen 10 knife sets a year for five years, its equipment cost is about $6 per set (300 ÷ 50), before consumables, electricity, and your time. If you sharpen only one set a year, the same tool is about $60 per set over five years. These are illustrative figures, not current quotes; local sharpening rates and equipment prices vary.
Also account for downtime and mistakes. A low-cost grinder that leaves a knife wavy can cost more in rework than a professional sharpening service. Conversely, frequent users may recover the cost of a dedicated sharpener through reduced trips and faster turnaround.
Signs the edge needs attention
- More tear-out or fuzzy grain than usual, especially when feed direction and depth of cut have not changed.
- A rougher surface, burn marks, or increased effort feeding the stock.
- Visible nicks that leave repeated raised lines across the board.
- Edges that dull quickly after sharpening, which can indicate overheating, poor steel condition, or abrasive contamination.
These symptoms can also come from a misaligned cutterhead, incorrect knife height, dull feed rollers, or unsuitable grain direction. Check setup before assuming the knife alone is at fault. Clean knives after resin-heavy work and store spares dry with their edges protected; grit and careless handling can undo a careful sharpening job.
Bottom line
For occasional sharpening a planer blade, hand honing with a stable guide or using a sharpening service is usually the sensible starting point. Choose a dedicated powered sharpener when you have frequent, compatible straight knives and value repeatable results enough to justify the space and setup. Replace blades with cracks, serious damage, or insufficient remaining length—and follow the machine maker’s instructions for every knife type.