What's inside
As an Amazon Associate I earn from qualifying purchases. This post may contain affiliate links at no extra cost to you.
For boring a few holes through floor joists, a spade bit is usually the cheaper, faster choice. An auger bit is easier to keep feeding through deep wood and tends to leave a cleaner hole, but it costs more and needs a drill with enough torque. Either can damage a joist if you drill in the wrong place or make the hole too large. Check the framing rules and the path for wires and pipes before choosing a bit.
As an Amazon Associate we earn from qualifying purchases at no extra cost to you.


What we cover
Auger bit vs. spade bit
| Factor | Auger bit | Spade bit |
|---|---|---|
| Best fit | Several deep holes, or cleaner, controlled boring | A few holes for cable or pipe where speed and cost matter |
| Cutting action | Screw tip pulls the bit into the wood; cutting edges clear chips through the flutes | Flat paddle cuts a wider path; you control the feed pressure |
| Drill demand | High torque, especially in large diameters or wet, dense lumber | Usually manageable in smaller sizes, but can catch abruptly |
| Hole quality | Generally more controlled, though the exit can still splinter | Fast but more prone to splintering and rough edges |
| Cost and storage | Usually pricier and longer | Usually inexpensive and compact |
When an auger bit makes sense
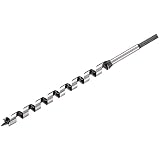
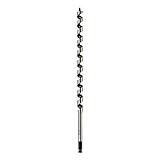
An auger’s threaded lead screw bites into the wood and draws the cutting edges forward. That helps on thick joists, where a spade bit can require steady pressure and frequent withdrawal to clear chips. The flutes carry waste out of the hole, which is useful when boring several holes in a row. A screw-point auger is also less likely to wander once the tip is seated.
The trade-off is torque. The screw point can pull hard enough to twist a drill or your wrist if the bit catches a knot or hidden fastener. Use a drill with a side handle if available, hold it with both hands, and keep the work steady. A clutch is not a substitute for control: on many drills, drilling mode bypasses the clutch. A slower speed and a firm grip are safer than forcing the bit.
Choose an auger when the holes are deep, numerous, or need to be reasonably clean. For ordinary framing lumber, a wood auger bit set covers common sizes, but check the bit’s usable length against the joist depth and your access to the drill.
When a spade bit is enough
A spade bit is a flat steel paddle with a center point and cutting wings. It is inexpensive, easy to carry, and perfectly serviceable for a small number of holes in ordinary, dry framing lumber. If you are making a modest opening for a cable and already own a suitable bit, buying an auger may not improve the job enough to justify the cost.
Spade bits can chatter, skate at the start, or splinter the back face as they break through. Mark the center clearly, start at low speed, and ease off as the point approaches the far side. For a cleaner exit, stop when the center point just appears on the other face, then finish from that side if you can reach it. A wood spade bit set is a reasonable budget option for occasional holes; avoid leaning your body weight onto a bit that has stopped cutting.
Match the bit to the drill and hole
Check the drill’s chuck capacity, bit shank, and manufacturer guidance. Large bits—especially augers—can stall a compact cordless drill or overheat its motor. A powerful drill with a side handle is a better match for repeated large holes. Use low gear for torque where the drill has two speeds. If the drill repeatedly bogs down, stop rather than holding the trigger until the battery, motor, or bit heats up.
Pick the smallest hole that will pass the wire, cable, or pipe without forcing it. Do not confuse bit diameter with a permissible hole size in a structural member. Rules depend on joist type and location; engineered I-joists and trusses have their own manufacturer-approved hole zones and limits. For solid-sawn joists, follow your local code and the applicable span and hole-location rules. If a hole would be too large or too close to an edge, reroute the run or ask a qualified carpenter rather than drilling and hoping.
Boring safely through a floor joist
Before drilling, identify the joist type, measure its depth and width, and mark a location allowed by the framing rules. Scan for existing wiring and plumbing, and inspect both sides of the joist when possible. A stud finder or scanner can help, but it cannot guarantee a clear path. Turn off relevant circuits before working near electrical wiring, and do not drill into an area you cannot reasonably check.
Keep the bit square to the joist face. Start slowly so the point does not skate, then let the cutting edges work without forcing them. Withdraw the bit periodically to clear chips, particularly with a spade bit. Stop if you encounter metal, an unexpected void, or a sudden change in resistance. Do not try to power through a nail or screw; it can damage the bit and cause the drill to kick.
For a typical small cable hole in an accessible solid-sawn joist, a spade bit is often the sensible buy. For repeated, deeper boring where feed and chip clearing matter, an auger earns its extra cost. In both cases, correct placement and a suitable hole size matter more than the bit style.