What's inside
As an Amazon Associate I earn from qualifying purchases. This post may contain affiliate links at no extra cost to you.
A countersink bit cuts a tapered seat around a pilot hole so a flat-head wood screw can finish level with, or just below, the surface. The right bit makes that fit repeatable; the wrong one can leave a screw proud, split the board, or remove too much wood. For most woodworking and household repairs, a matching pilot-and-countersink bit is the easiest place to start.
As an Amazon Associate we earn from qualifying purchases at no extra cost to you.


What we cover
Choose by screw size and head
Match the countersink to the screw’s head, not just its shank. Common wood screws in sizes #6, #8, and #10 have different head diameters and taper angles, so one countersink may not seat all three cleanly. If possible, test the actual screw in scrap from the same material. Tight contact around the underside of the head matters more than a perfect-looking bevel on its own.
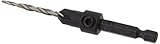
A combination bit drills a pilot hole and cuts the countersink in one setup. Many have an adjustable depth stop or a collar that controls how far the cutter enters. This is useful for a batch of holes, but the setting takes a test cut to dial in. A separate countersink gives you more control over depth and can be paired with a pilot hole drilled to suit the wood and screw.
Bit types and trade-offs
| Type | Best for | Trade-off |
|---|---|---|
| Combination pilot-and-countersink | Repeated screw holes in one material and screw size | Convenient, but its pilot diameter may not suit every wood or screw |
| Adjustable combination bit | Changing pilot depth or countersink depth between jobs | More setup; collars can slip if not tightened securely |
| Separate countersink cutter | Fine control, repairs, and existing pilot holes | Requires a separate drilling step and careful alignment |
| Multi-flute countersink | Smoother cuts in many woods and less chatter-prone setups | Costs more; sharpness and correct speed still matter |
For a basic kit, a wood countersink bit set with sizes covering your usual screws is usually more useful than a large assortment of specialty cutters. Check the stated screw-size range, shank diameter, and whether pilot bits are included. A set is less appealing if you only use one screw size; a single correctly sized cutter may be cheaper and simpler.
Material, flutes, and cutting action
High-speed steel cutters are adequate for occasional work in softwood and plywood. For frequent use, hardwood, or a busy shop, a sharper, well-made cutter generally stays usable longer. Carbide is hard and wear-resistant, but can chip if dropped or used carelessly; it is not automatically the best value for a homeowner making a few dozen holes a year.
Flute count affects how the cutter engages the wood. A single-flute design can cut cleanly with low chatter when held steady, while multi-flute designs can produce a smoother seat in some setups. Neither will rescue a dull edge or a wobbling drill. If the bit burns the wood, chatters, or leaves torn fibers, stop and inspect it rather than pushing harder.
A countersink is not a substitute for a clearance hole when the screw must pull two pieces together. In the top piece, the screw shank should pass freely; threads biting both pieces can hold a gap open. Drill a suitable clearance hole where needed, then countersink only enough for the head to sit flush.
Use it with a drill or impact driver
A cordless drill is the better default for countersinking. Set it to a low or moderate speed, keep the bit square to the surface, and use light pressure. A countersink removes material quickly near the end of the cut, so stop, check the screw, and deepen the seat in small steps. Starting around 500–1,000 rpm is a reasonable range for many hand-drill setups; adjust to the bit maker’s guidance and the wood. Slow down if the cutter chatters or heats up.
Impact drivers can run hex-shank countersink bits, but their hammering action makes depth harder to control. They are workable for quick, rough jobs with a sharp bit and a light trigger; they are a poor choice for a row of carefully matched flush heads. If you already own one, choose a compatible hex-shank countersink bit and test on scrap before drilling the finished piece.
Do not use the driver to force a blunt screw through an undersized pilot hole. That can snap the screw, strip the drive recess, or split the board, especially near an edge. A pilot hole should generally be close to the screw’s root diameter in hardwood and somewhat smaller in softwood, but screw geometry varies. A pilot-hole chart from the screw maker is more reliable than guessing by eye.
Avoid proud heads, tear-out, and over-countersinking
For clean entry, clamp the work and support the back of thin stock. On plywood or veneer, use a sharp cutter and gentle feed; a deep bevel can break through a thin face layer. If the screw head sits proud, deepen the countersink slightly or confirm that the head style matches the cutter. If it drops too far below the surface, the hole is oversized or the cut went too deep; filler may hide the recess, but it will not restore lost holding strength.
Clear chips from the flutes during longer runs, and avoid leaning the drill sideways to widen a seat. Side pressure makes an uneven cone and can enlarge the opening. For repeat work, use a stop collar or depth-stop combination bit, then check the first few screws before committing to the whole batch. A cheap bit is fine for occasional softwood repairs if it is sharp and the fit is acceptable; upgrade when you need consistent depth, cleaner cuts, or enough durability to justify the added cost.