What's inside
As an Amazon Associate I earn from qualifying purchases. This post may contain affiliate links at no extra cost to you.
The best EMF meters for electromagnetic field detection depend on what you need to locate: a low-cost single-axis meter is suitable for quick comparisons, while a three-axis meter with separate AC magnetic, electric, and RF ranges is the better choice for repeatable household or workshop surveys.
As an Amazon Associate we earn from qualifying purchases at no extra cost to you.


What we cover
Quick picks by situation
| Situation | Best meter type | Useful minimum specification | Typical market range |
|---|---|---|---|
| Occasional checks around a desk, bed, or power tool | Basic three-axis ELF/EMF meter | 40 Hz–100 kHz; mG or µT display; audible alarm | $60–$130 |
| Finding the strongest point near wiring or appliances | Single-axis magnetic-field meter | 0–2,000 mG or wider; peak hold; selectable units | $30–$90 |
| Household wireless devices and routers | Dedicated RF meter | At least 100 MHz–8 GHz; power-density display; peak mode | $150–$450 |
| One instrument for low-frequency and wireless checks | Combined ELF/RF meter | Three-axis ELF plus RF coverage to at least 6–8 GHz | $250–$500 |
Best EMF meters for electromagnetic field detection
TriField TF2: best simple all-rounder
The TriField TF2 is a practical choice for people who want one handheld instrument for basic magnetic, electric, and radio-frequency surveys. Its three-axis magnetic sensing makes readings easier to interpret because the meter does not need to be carefully rotated to find the field’s maximum direction. It also provides separate modes for magnetic fields, electric fields, and RF energy, plus an audible alert and peak-hold function.
Its main strength is usability rather than laboratory-level analysis. The display is quick to understand, and the meter is useful for comparing locations: beside a charger, near a switch box, around a dust collector, or at different distances from a wireless device. It is less suitable when you need frequency identification, data logging, or a detailed spectrum view.
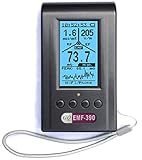
GQ Electronics EMF-390: best for more detailed logging
The GQ EMF-390 is aimed at users who want a more information-rich handheld meter. Depending on the selected mode, it can monitor low-frequency magnetic and electric fields as well as RF signals, and it offers features such as data recording, alarms, and a rechargeable battery. That makes it useful for repeated checks in a home workshop, where you may want to compare a tool switched off, idling, and running under load.
This extra functionality also creates a learning curve. A high number on the screen is not automatically a dangerous or meaningful number: the source, frequency range, distance, orientation, and meter mode all matter. Treat its readings as survey information, not as a substitute for an electrical inspection.
Safe and Sound Pro II: best for RF-focused work
The Safe and Sound Pro II is designed primarily for radio-frequency detection. It is a sensible pick when your question concerns Wi-Fi equipment, cellular signals, cordless devices, or other transmitters rather than mains wiring. RF meters in this class generally show power density, often in microwatts per square metre or milliwatts per square metre, and can provide an audible signal that makes it easier to locate a source.
A dedicated RF meter can be more informative than a combined low-cost device because its antenna and circuitry are designed for higher-frequency work. However, it will not replace a low-frequency magnetic meter for investigating a breaker panel, motor, transformer, extension cable, or power-tool cord.
Cornet ED88TPlus: best for users wanting broad coverage
The Cornet ED88TPlus is a combined meter intended to cover both low-frequency fields and RF signals in one instrument. It is attractive when storage space and budget do not allow separate meters. Features commonly associated with this model include a color display, audible indication, peak or maximum readings, and a broad RF measurement range.
Combination meters are convenient, but broad coverage does not mean identical accuracy in every mode. Confirm which sensor is active, whether the displayed RF number is an average or peak value, and whether the low-frequency reading is measured on one axis or three. For source-finding near a motor or cable, a dedicated magnetic meter may still be easier to use.
Single-axis versus three-axis sensing
A single-axis meter measures the field along one direction. If the sensor is held at the wrong angle, the displayed value can be much lower than the actual field. You can rotate the instrument through three orientations and record the highest reading, but that takes time and introduces user error.
A three-axis meter uses orthogonal sensors and combines their readings. In an idealized vector measurement, the field magnitude is calculated as:
Total field = √(X² + Y² + Z²)
For example, if the three axes read 2 mG, 3 mG, and 6 mG, the combined value is approximately 7 mG. Three-axis sensing is particularly useful for quick comparisons around furniture, appliances, workshop machinery, and cables. It does not automatically make the meter more accurate; sensor quality, calibration, bandwidth, and the way the electronics combine the axes still matter.
AC, DC, and RF ranges: choose by source
- AC magnetic field: Usually measured in milligauss (mG) or microtesla (µT), often around the 50/60 Hz mains frequency and its harmonics. Motors, transformers, wiring, chargers, and power tools are typical sources.
- AC electric field: Usually shown in volts per metre (V/m). Readings can change substantially with grounding, body position, and the meter’s proximity to insulated conductors.
- RF field: Commonly measured in microwatts per square metre (µW/m²), milliwatts per square metre (mW/m²), or sometimes V/m. Wireless routers, cellular transmitters, Bluetooth devices, and cordless equipment fall into this category.
- DC magnetic field: Measured in mG or µT, but not every consumer meter measures it. Permanent magnets, speakers, some motors, and magnetic tools require a meter with a stated DC range.
Do not compare a number in mG directly with a number in V/m or µW/m². They describe different field quantities. Also check bandwidth: a meter specified only to 100 kHz may not detect a 2.4 GHz wireless signal, while an RF meter may ignore the low-frequency magnetic field from a saw motor.
Features that improve everyday detection accuracy
- Peak hold: Captures short spikes that an averaged display may hide.
- Audible alarm: Helps locate a source while your eyes remain on the cable or tool.
- Data logging: Useful for comparing operating states and documenting changes.
- Selectable units: Avoids repeated manual conversions between mG and µT. One microtesla equals 10 milligauss.
- Response speed: A slow display can miss changes as you move past a source; a very fast display may be harder to read.
- Backlight and screen size: Important in a dim electrical cupboard or dusty workshop.
- Shielded or directional RF antenna: Helps identify where a transmitter is coming from, although an omnidirectional sensor is often better for general exposure surveys.
How to take a useful reading
- Check the meter first. Inspect the case, confirm the battery level, select the correct mode, and move away from obvious transmitters or energized equipment before recording a baseline.
- Measure at a fixed distance. Start at 30 cm, then repeat at 10 cm or at the position where a person normally stands. Distance changes can dominate the result.
- Use a grid for large areas. In a workshop, measure the bench, control panel, floor near buried cables, and normal standing position. Record location, equipment state, and reading.
- Repeat with the source off and on. A difference between the two conditions is more informative than an isolated number.
- Rotate single-axis meters. Take readings from three perpendicular orientations and use the maximum or calculate the vector result if the instrument provides that function.
- Separate low-frequency and RF surveys. Switch modes deliberately; do not assume a combined meter is measuring both ranges at once.
Calibration, maintenance, and ownership
Consumer EMF meters are usually factory-calibrated, but calibration can drift after impact, moisture exposure, battery leakage, or years of use. A reset or zero function is not the same as full calibration. For work that supports an electrical-safety decision, use a meter with a documented calibration service or have the environment checked by a qualified electrician or appropriately equipped measurement professional.
The parts most likely to cause trouble are the battery, buttons, display, charging port, and RF antenna area—not a replaceable cutting edge or probe. Keep the instrument in a case, avoid placing it directly on energized metal, clean it with a dry or lightly damp lint-free cloth, and never use solvents around the screen or sensor openings. Rechargeable models should not be stored completely flat for long periods.
As a simple runtime calculation, a meter with a 1,000 mAh battery drawing 50 mA would have a theoretical runtime of 20 hours. Allowing for display brightness, alarm use, battery aging, and conversion losses, planning on roughly 12–16 practical hours is more realistic. That matters if you intend to map a whole workshop rather than make a two-minute spot check.
Bottom line
Choose a three-axis ELF meter for fast everyday comparisons, a single-axis meter when low purchase cost and source direction matter most, and a dedicated RF meter when wireless signals are the main question. For the broadest coverage, select a combined instrument with clearly stated frequency ranges, peak indication, separate units, and a documented calibration path. The most trustworthy result comes from consistent distance, repeated measurements, correct sensor orientation, and recording what equipment was operating—not from choosing the meter with the largest number on its display.