What's inside
As an Amazon Associate I earn from qualifying purchases. This post may contain affiliate links at no extra cost to you.
Cabinet carcasses are usually assembled with screws driven into plywood, particleboard, or MDF. An impact driver can speed up that work, especially when there are many fasteners, but its extra torque also makes it easier to strip a screw head, bury a head too deep, or damage the panel. For cabinet assembly, control matters more than maximum power.
As an Amazon Associate we earn from qualifying purchases at no extra cost to you.



What we cover
What to look for in an impact driver
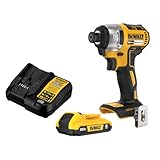
For typical cabinet screws, a compact 12-volt or 18-volt driver is enough. Compare bare-tool size, weight, speed settings, and trigger control rather than choosing by the highest advertised torque. A shorter head helps inside narrow cabinet openings; a lower speed setting gives you more time to stop before the screw pulls through.
A 1/4-inch hex chuck accepts common driver bits, but it does not hold ordinary round-shank drill bits unless they have a hex shank. If you need to drill accurate pilot holes, use a separate drill or a hex-shank bit rated for the driver. Many users will get better results from a drill/driver for assembly and reserve the impact driver for repetitive fastening.
Quick comparison
| Option | Best use | Main trade-off |
|---|---|---|
| Compact 12V impact driver | Small kitchens, light cabinet assembly, tight spaces | Less runtime and reserve power for long screws |
| 18V impact driver with speed settings | Repeated assembly and occasional longer fasteners | More weight; easy to overdrive small screws |
| Drill/driver instead | Short screws, delicate materials, precise depth control | Slower on large batches; may need more wrist effort |
Which type to buy
If you already own batteries from a cordless tool platform, a compact impact driver that uses those batteries is usually the sensible buy. Battery compatibility matters more than small differences in speed or claimed torque. For a one-off cabinet project, a basic drill/driver may be enough; there is little reason to buy a high-output impact driver just to install a few dozen screws.
For frequent cabinet work, look for a compact 12V impact driver with at least two speed settings and a variable-speed trigger. It is lighter and easier to maneuver than many full-size tools. Choose an 18V impact driver with multiple speed settings if you also drive longer construction screws or need to work through a large batch without frequent battery changes. The added power is useful elsewhere, but not a requirement for ordinary cabinet assembly.
Screws, bits, and pilot holes
Use cabinet or construction screws suited to the panel and joint. A coarse-thread screw commonly suits plywood and many composite panels, but follow the cabinet maker’s instructions where available. Avoid using drywall screws for structural cabinet joints: their brittle heads can snap under load.
Match the driver bit exactly to the screw recess. A loose Phillips or square bit can cam out, chewing up the head and leaving a fastener difficult to remove. Keep a fresh bit nearby; wear shows up as slipping and rounded corners. For a typical #8 screw, a roughly 1/8-inch pilot hole is a common starting point in solid wood, but panel materials and screw cores vary. Test on scrap of the same material rather than treating that size as universal. Pilot holes are particularly helpful near panel edges and in dense hardwood.
Drive cabinet screws without damage
Clamp the joint flush before fastening. Start the screw slowly and keep the bit square to the surface. Use a low speed setting, if available, and release the trigger as soon as the head seats. An impact driver’s hammering action can begin abruptly, so do not lean on the tool and assume the clutch will stop it; many impact drivers have no adjustable torque clutch.
Overdriving is a common failure. A screw head buried below the surface can crush a thin face veneer or strip particleboard, weakening the joint. If the head is still proud, finish with short trigger pulses rather than holding the trigger down. If a screw spins without tightening, stop. Backing it out and installing a larger screw may not restore a damaged edge; move the fastener location or repair the hole with a suitable plug or filler, depending on the joint and load.
For a clean, repeatable depth, a drill/driver with a clutch or a depth stop may be easier than an impact driver. An impact driver remains useful for long runs of screws, but check the first few fasteners in scrap and adjust your technique before working on finished cabinet panels.
When an impact driver is the wrong choice
Skip the impact driver for tiny hardware, delicate face-frame details, or fasteners close to a panel edge unless you can control speed and have drilled suitable pilots. It can also be noisy and produce more vibration than a drill/driver. For hinge adjustments and short screws, the slower tool is often quicker overall because it avoids stripped heads and repairs.
When comparing kits, account for batteries and charger: a bare tool is only a bargain if you already own compatible batteries. A smaller battery keeps the tool lighter for overhead work, while a larger one runs longer but adds bulk. For cabinet carcasses, a compact tool, sharp matching bits, and careful pilot holes generally deliver more value than extra torque.