What's inside
As an Amazon Associate I earn from qualifying purchases. This post may contain affiliate links at no extra cost to you.
Installing structural connectors is a different job from driving ordinary deck screws. Joist hangers, straps and hold-downs often call for many approved connector screws, and a driver that is too bulky or poorly controlled can leave fasteners proud, damage the work or make access miserable. The right choice is usually a compact 18V-class impact driver with a predictable trigger and a bit that fits the fastener—not the tool with the biggest torque number on its box.
As an Amazon Associate we earn from qualifying purchases at no extra cost to you.



What we cover
Match the driver to the connector
First check the connector manufacturer’s instructions. They specify which nails or screws are approved; a generic construction screw is not automatically an acceptable substitute. Some connectors are designed for dedicated connector screws, while others require nails. An impact driver can install screws, but it is not a reason to change the specified fastener.
For screw-installed connectors, most homeowners and remodelers will be well served by a 12V or 18V cordless impact driver with a 1/4-inch hex collet. A compact 12V tool is easier to fit between framing members and is generally ample for common connector screws. An 18V tool offers more reserve for long or larger-diameter fasteners and is a better choice if the same driver will also handle structural screws elsewhere. A high-torque impact wrench is usually unnecessary and harder to control in tight work.
What to prioritize when buying
Look for a short head-to-back length, a variable-speed trigger that responds smoothly, and at least one reduced-speed or assist mode. Those features matter more than an advertised torque figure: published torque tests vary, and connector work rarely benefits from driving every screw at maximum speed. A bright work light is useful inside a joist bay. A belt hook is convenient, but not a substitute for a good grip when working overhead.
If you own batteries already, staying with that platform usually saves more than choosing a bare tool with a slightly better specification. Compare the included battery size, too. A small battery keeps the tool light, but a second battery is useful when a job involves dozens or hundreds of fasteners.
Which driver setup makes sense?
| Option | Best fit | Trade-off |
|---|---|---|
| Compact 12V impact driver | Small connector screws, tight bays, occasional work | Less reserve for repeated long fasteners |
| 18V compact impact driver | Regular framing and general fastening | Typically heavier and larger than a 12V tool |
| Basic single-speed impact driver | Budget jobs with good access and a practiced hand | More care needed to avoid overdriving or damaging the bit |
| Drill/driver with clutch | Small batches and situations needing careful torque control | Slower on many screws; clutch settings do not replace connector instructions |
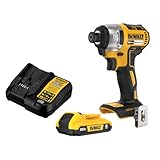
For a first cordless tool, a compact 12V impact driver kit is a sensible pick for occasional connector work. Choose an 18V compact impact driver kit with speed modes if you expect heavier use or already own batteries in that platform. A less expensive single-speed driver is fine when the fasteners are short, access is open and you can test your technique on scrap first.
Bits and fasteners matter as much as the tool
Use the exact drive style and size specified for the connector screw. A loose-fitting bit cams out, chews the recess and can leave a screw only partly seated. Keep a spare bit on hand: worn tips slip more readily, especially after repeated impact loading. A short bit gives better control in most locations; an extension can help reach a recessed connection but adds flex and makes it easier to tilt the screw.
Do not assume that a longer screw is stronger or acceptable. Connector schedules account for the fastener’s diameter, length, quantity and placement. Missing a hole, substituting a deck screw or driving a screw at an angle can reduce the connection’s capacity. If access prevents you from installing the specified fastener properly, stop and check the connector maker’s guidance rather than improvising.
Drive screws without damaging the connection
Set the connector flat against the framing and start each screw straight. Use a steady, moderate trigger pull; let the driver work instead of leaning hard on it. Stop when the head is seated as required by the screw manufacturer. Driving until the tool hammers for several extra beats can strip the drive, damage the screw head or crush the connector surface. A protruding head can also interfere with the connection or indicate that the screw has not seated correctly.
On an unfamiliar fastener, try one screw in a similar piece of lumber. Lumber density and grain vary, so the same speed setting may behave differently in dry, dense material than in softer stock. If the driver twists sharply, the bit jumps, or the screw stalls before seating, release the trigger and inspect the bit, screw and alignment. Do not keep hammering on a damaged recess.
Some connector screws are large enough that a properly sized pilot hole may be allowed or required by their instructions, particularly near an end or edge of framing. Do not drill pilot holes by habit: an oversized or misplaced hole can undermine the connection, and some fasteners are intended to be installed without one. Follow the fastener documentation.
Safety and final checks
Wear eye protection; impact drivers can break bit tips or eject chips. Keep fingers clear of the screw path, especially when starting a fastener in a narrow hanger. Support the work securely and use a stable ladder or platform rather than reaching sideways to get the last screw. Remove the battery before changing bits or clearing a jam.
After installation, check that every required hole has the correct fastener and that each head is seated as specified. Look for bent connectors, split framing, stripped screws and missed holes. If any are present, do not cover the connection until you have checked the manufacturer’s repair guidance or consulted a qualified professional. A suitable driver makes the work easier, but correct fasteners and complete installation determine whether the connector does its job.