What's inside
As an Amazon Associate I earn from qualifying purchases. This post may contain affiliate links at no extra cost to you.
The best mortise drill bit is a sharp, square-corner mortising chisel-and-auger set matched to your machine, wood species, and required mortise depth—not an ordinary twist bit or a generic “wood drill bit.”
For a dedicated mortising machine, choose a hollow chisel with an internal auger sized to the required tenon. For a drill press, use a mortising attachment only if the quill, column, and table are rigid enough. A hand drill is suitable for pilot holes and rough waste removal, but it is a poor choice for cutting clean, accurately located mortises.
As an Amazon Associate we earn from qualifying purchases at no extra cost to you.


What we cover
Quick picks by woodworking situation
| Situation | Best choice | Useful size range | Why it fits |
|---|---|---|---|
| Occasional furniture repairs | Single 1/4-inch or 5/16-inch hollow-chisel set | 6.35–7.94 mm | Low cost, common joinery size, easy to sharpen and replace |
| General hardwood furniture | High-speed-steel chisel and auger set | 1/4–1/2 inch | Good balance of edge life, cutting speed, and availability |
| Frequent production work | Precision-ground set with replaceable or widely available parts | 1/4–3/4 inch | Consistent sizing and less downtime when an auger or chisel wears |
| Deep mortises in softwood | Longer chisel with aggressive four-flute auger | Up to about 3 inches of practical depth | Moves chips efficiently without excessive burning |
| Portable or limited-space shop | Forstner bit followed by a chisel, or a router jig | 1/4–1/2 inch mortises | More controllable than forcing a mortising attachment into a light drill press |
Mortise drill bit terminology: what you are actually buying
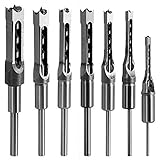
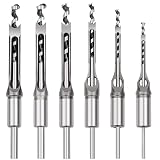
A traditional mortise drill bit is a two-part cutting system. The square outer component is the hollow mortising chisel. Inside it, an auger bit removes the bulk of the waste and carries chips upward. The chisel pares the walls and creates the square corners.
That is why listings may use several names for the same product: mortise chisel drill bit, mortise chisel and drill bit, hollow-chisel mortising bit, or mortising attachment. The “drill bit” alone is not the complete tool. A loose auger can drill a hole, but it will leave round ends and cannot produce the characteristic square mortise.
Mortise bits for drill presses are normally used with a mortising attachment that clamps around the quill and supports the chisel. A mortise bit for a hand drill usually means a specialized portable mortising guide or a loose auger-and-chisel arrangement, not a tool that should be held freehand. Handheld drilling makes it difficult to maintain vertical alignment and can cause the chisel to grab.
Compare cutting geometry before brand or price
Chisel thickness and corner relief
The chisel’s outside dimensions determine the mortise width, while its internal opening determines how much room the auger has to clear chips. A sharp four-sided chisel should have clean, even corners and slight relief behind the cutting edges. Excessive relief weakens the corners; too little relief creates friction and heat.
For common furniture, a 1/4-inch mortise is useful for small rails and compact frames, 5/16 or 3/8 inch suits many chair and cabinet joints, and 1/2 inch is better for substantial table legs or structural frame members. The mortise should generally be around one-third the thickness of the stock when strength and appearance both matter, although the tenon design remains the controlling factor.
Auger flute shape
A spiral auger with a pronounced lead point starts cleanly and lifts chips well. A four-flute design is often effective in hardwood because it distributes cutting load, while a more open flute can evacuate long softwood chips quickly. The auger must not project so far below the chisel that it drills a deep round hole before the chisel engages.
When comparing sets, look for an auger that can be adjusted so its point extends only slightly beyond the chisel’s cutting edge. Too much projection increases feed force and can make the bit pull itself into the work.
Depth, diameter, and wood species
Choose diameter from the tenon, not from the bit set’s number of pieces. Then check the usable chisel length. Many compact sets cut mortises around 1-1/2 to 2 inches deep; longer industrial-style sets may reach approximately 3 inches, provided the machine has enough travel and the workpiece can be clamped securely.
- Softwood: Open-grain pine, spruce, and fir cut quickly but can pack resin and fibrous chips into the chisel. Clear chips frequently and reduce feed pressure if the walls begin to tear.
- Moderately hard wood: Maple, cherry, walnut, and ash benefit from sharp high-speed-steel edges and a slower, steady feed.
- Hard or abrasive wood: Dense maple, beech, hickory, and some exotic species put more heat and wear on the corners. Use shallow pecking passes, wax only where appropriate for the wood and tool manufacturer, and expect more frequent honing.
- Engineered panels: MDF and particleboard can dull edges rapidly and create fine dust. A router or dedicated boring setup may be more suitable for repeated work.
For a deep mortise, do not assume that a larger bit is automatically better. A 1/2-inch chisel removes roughly four times the cross-sectional area of a 1/4-inch mortise, so feed pressure and chip congestion rise quickly. On a small machine, two or more overlapping passes may be safer than forcing the widest bit.
Drill press versus mortising machine
A dedicated mortising machine has a rigid head, a short quill, a purpose-built chisel holder, and a table designed for repeated plunge cuts. It is the best match for a full mortise chisel drill bit set, particularly when making multiple identical joints.
A drill press mortising attachment can work well for occasional projects, but capacity depends on more than motor horsepower. Check the quill diameter, available travel, table size, head rigidity, and whether the attachment clamps securely without restricting the return spring. A light benchtop press may handle 1/4-inch mortises in pine but struggle with repeated 1/2-inch cuts in hard maple.
For a hand drill, use a marked depth stop and a guide only for preliminary waste removal. A Forstner bit can create a series of overlapping holes, after which a sharp bench chisel squares the walls. This is slower than a mortising machine but usually more accurate than attempting to control a square chisel freehand.
Setup procedure for cleaner mortises
- Match the set to the holder. Confirm the chisel shank and auger length fit the machine or attachment. A nominal 1/2-inch bit is not enough information if the holder accepts only a specific shank diameter.
- Set the auger projection. Let the auger lead the chisel slightly, typically by about 1/16 inch, unless the manufacturer specifies another setting.
- Align the chisel. The open face or relief orientation should match the holder instructions. Tighten the chisel clamp firmly but leave enough clearance for the chisel to slide during heat expansion.
- Mark the ends. Start near one end of the mortise and work toward the other, leaving the final end for a controlled cleanup cut. This reduces blowout at the exit.
- Use overlapping plunges. For a mortise longer than the chisel width, overlap each plunge slightly rather than dragging the tool sideways under power.
- Clear chips. Withdraw the bit periodically, especially in deep hardwood mortises. Packed chips create heat, increase torque, and can force the chisel out of alignment.
Ownership costs and common failure points
In normal use, the chisel corners and the auger’s cutting lips wear before the rest of the tool. Dull corners leave rounded or ragged mortise ends; a dull auger makes the machine labor and encourages excessive downward pressure. Resin buildup can mimic dullness, so clean the tool before sharpening it.
Light honing on the outside cutting faces can restore a chisel, but removing material from the inside faces enlarges the mortise and changes the fit. The auger point and lips can be sharpened with the correct small files or replaced when damaged. Do not grind aggressively: loss of symmetry makes the bit cut oversize or wander.
As a rough ownership calculation, suppose a $40 mortising set makes 100 usable joints before sharpening or replacement. Its tool cost is about $0.40 per joint. A $90 precision set lasting 400 joints costs about $0.23 per joint, before machine time and consumables. The more expensive set can therefore be the better value for repeated work, while the less expensive set makes sense for occasional repairs.
Bottom line
For most woodworkers, a sharp 1/4-, 5/16-, or 3/8-inch high-speed-steel hollow-chisel set is the most useful starting point. Choose a longer, chip-efficient auger for deep work, prioritize rigid support when using a drill press, and avoid treating a mortise bit for a hand drill as a freehand tool. The cleanest joinery comes from matching the chisel diameter to the tenon, controlling depth, and clearing chips before friction turns a precise cut into a burned, oversized mortise.