What's inside
As an Amazon Associate I earn from qualifying purchases. This post may contain affiliate links at no extra cost to you.
For building a workbench, a cordless drill driver is usually the better first tool. It drills clean holes, drives screws with more control, and accepts a wide range of bits. An impact driver is faster and stronger when driving long screws or structural fasteners, but its hammering action can damage small screws, tear up plywood, and make accurate assembly harder.
For most benches, the best setup is a drill driver for drilling and general assembly, with an impact driver added later if you regularly build with thick lumber or drive many long screws. The cheaper option is fine when your project uses 1-1/4- to 2-1/2-inch screws and predrilled holes.
As an Amazon Associate we earn from qualifying purchases at no extra cost to you.



What we cover
What Each Tool Does
A drill driver uses a smooth rotating chuck. You can tighten it around twist bits, countersinks, spade bits, driver bits, and hole saw arbors. Its clutch lets you limit torque, which is useful when driving screws into plywood, softwood, or thin hardware.
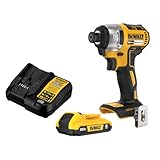
An impact driver uses a hex-shaped quick-change chuck and an internal impact mechanism. When resistance rises, the tool delivers short bursts of rotational force. Those impacts help drive a long screw through dense wood, but they also produce more noise, vibration, and bit wear.
| Feature | Drill driver | Impact driver |
|---|---|---|
| Best use | Drilling, pilot holes, controlled screw driving | Long screws, lag screws, repeated fastening |
| Chuck | Adjustable three-jaw chuck | 1/4-inch hex quick-change chuck |
| Control | Usually smoother, with an adjustable clutch | More forceful and less gentle at low resistance |
| Noise | Relatively quiet | Loud impact mechanism; hearing protection is sensible |
| Typical failure | Bit stalls or the motor overheats under heavy load | Strips screw heads, snaps small screws, or overdrives fasteners |
Why a Drill Driver Is Usually the Better First Purchase
Workbench construction involves more than driving screws. You may need to drill pilot holes, enlarge holes for bolt heads, install threaded inserts, bore holes for bench dogs, and countersink screw heads. A drill driver handles all of these jobs with the right accessory.
Its clutch is especially valuable during assembly. Start with a low or medium setting and increase it only until the screw seats. This reduces stripped heads and prevents a screw from pulling through a 3/4-inch plywood top. A two-speed model is useful: the low range supplies more torque for larger bits, while the high range gives cleaner, faster drilling with small bits.
Look for a cordless drill driver with a 1/2-inch chuck if you expect to use larger bits or hole saws. A 3/8-inch chuck is adequate for ordinary pilot holes and small woodworking bits, and can be lighter and less expensive. For a first tool, a cordless drill driver kit with two batteries is more practical than a bare tool.
When an Impact Driver Earns Its Place
An impact driver becomes useful when the workbench includes 3-inch or longer construction screws, thick 4×4 legs, laminated tops, or many repeated fasteners. It is less likely to twist your wrist when a screw binds, and its compact nose fits between framing members.
For example, fastening a 2×4 apron to a leg with 3-1/2-inch screws is easier with an impact driver, particularly if the wood is hard or the screw is close to the limit of a small drill motor. Predrill first, though. An impact driver is not a substitute for a pilot hole. Without one, the screw can split the end of a rail, especially within 2 inches of the edge.
Choose a cordless impact driver kit if you routinely build decks, shop cabinets, storage racks, or heavy framing. A brushless motor generally offers better efficiency and durability, but a brushed tool can be perfectly adequate for one workbench. Buy into the battery system you already own when possible.
Use the Right Bits and Fasteners
Impact drivers require impact-rated 1/4-inch hex bits. Standard bargain bits can twist, chip, or snap under the impact mechanism. Use a magnetic bit holder for ordinary screws, but keep a selection of short impact-rated driver bits for better control.
A drill driver can use standard bits, but quality matters there too. A dull bit creates excess heat and makes the tool work harder. For common workbench construction, keep 1/8-inch and 3/16-inch twist bits for pilot holes, a countersink bit for flat-head screws, and a 3/8-inch or 1/2-inch bit for clearance holes.
Use construction screws designed for wood rather than drywall screws. Drywall screws are brittle and can snap when driven into framing. For a 2×4-to-2×4 joint, 3-inch structural or construction screws are common; for attaching a 3/4-inch top to a frame, 1-1/4- to 1-5/8-inch screws usually reduce the chance of poking through the surface. Confirm the actual thickness of your materials before choosing screw length.
A Practical Two-Tool Workflow
Lay out and clamp the workpiece first. Use the drill driver to drill every pilot hole and countersink. Switch to the impact driver only for long structural screws or fasteners that require substantial torque. This keeps the impact driver from damaging small hardware and saves battery power.
Drive screws until the head is flush, not buried. If the impact driver keeps sinking the screw, release the trigger earlier or finish with the drill driver on a low clutch setting. A screw driven 1/8 inch below the surface removes useful material and can crush plywood veneers.
For large holes, use the drill driver’s low gear and steady pressure. Do not force a spade bit through a knot. Back the bit out periodically to clear chips. If the drill stalls repeatedly, use a sharper bit or a larger-capacity tool rather than holding the trigger against a locked bit until the motor overheats.
Which One Should You Buy?
Buy a drill driver first if this is your first cordless tool, your bench will use plywood and ordinary dimensional lumber, or you need one tool for drilling and fastening. A basic kit is enough for a straightforward bench.
Buy an impact driver first only if you already have access to a drill, or if your projects mainly involve long structural screws. For a serious workshop, owning both is convenient: the drill stays fitted with a bit, while the impact driver stays fitted with a driver bit. If you need wall anchors or future cabinet installation, a drill driver remains the more versatile choice; a mixed drill bit set will expand its usefulness more than an impact driver will.