What's inside
As an Amazon Associate I earn from qualifying purchases. This post may contain affiliate links at no extra cost to you.
The right fastener depends on how thick the plywood is, how much weight it will carry, and whether you can drill into the concrete behind it. For most indoor projects, concrete screws are the simplest reliable choice. Powder-actuated pins are faster for suitable jobs, while hammer-set anchors can make sense when cost matters more than easy removal.
As an Amazon Associate we earn from qualifying purchases at no extra cost to you.


What we cover
Choose the fastener for the load and plywood thickness
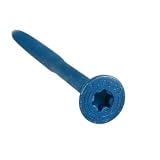
Concrete screws cut threads into a predrilled hole. They are removable, widely available and a good fit for attaching plywood sheathing, workshop panels or light framing to sound concrete. A common size is 3/16 inch in diameter; 1/4-inch screws offer more capacity but need a larger hole and more clearance from concrete edges. Follow the fastener maker’s load ratings and installation instructions rather than treating diameter alone as a capacity guarantee.
Plan for the screw to embed about 1 to 1-1/2 inches into solid concrete after passing through the plywood. Add the plywood thickness to the specified embedment to choose screw length. For example, with 3/4-inch plywood and 1-1/4 inches of embedment, a 2-inch screw is a reasonable starting length if that size is approved for the application. Avoid counting loose plaster, foam or surface coatings as concrete embedment.
For shelves, cabinets or other concentrated loads, use a fastening layout based on the load and manufacturer ratings. A sheet of plywood spreads load, but it does not make an undersized anchor safe. If a failure could hurt someone or damage valuable equipment, use rated anchors and get the connection checked rather than relying on a rule of thumb.
Fastener comparison
| Fastener | Best use | Main trade-off |
|---|---|---|
| Concrete screw | General indoor plywood attachment; jobs that may need adjustment or removal | Requires a correctly sized, clean pilot hole |
| Powder-actuated pin | Fast attachment of thin plywood or furring to suitable concrete | Not suitable for every concrete condition; hard to remove and easy to misuse |
| Hammer-set anchor | Low-cost, light-duty work with modest loads | Less convenient to remove; can loosen or damage the hole if poorly set |
| Wedge or sleeve anchor | Heavy-duty connections through thicker material | Usually excessive for sheet plywood and needs more edge distance and installation care |
Concrete screws: the best default
For most DIY plywood-to-concrete work, start with a box of concrete screws and the specified masonry bit. These screws are a practical choice when you want predictable installation and the option to remove the plywood later. Buy screws with a head suited to the job: a flat or washer-style head can hold plywood securely, while a countersunk head may pull too deeply into the wood unless the hole is carefully countersunk.
Use a hammer drill for faster drilling in concrete, but keep the hole straight and use the exact bit diameter listed on the fastener packaging. A standard drill can work for a small number of holes in softer concrete, though it will be slower. A concrete screw kit with the matching masonry bit can simplify a small project; check that the included screw length suits your plywood thickness.
Drill deeper than the required embedment—often about 1/4 inch extra—to leave room for dust. Vacuum or blow out each hole before driving the screw. Dust left in the bottom can stop the screw early or make it feel tight before it is fully seated. Drive with a drill or impact driver on a moderate setting, keeping the bit fully engaged. Stop if the screw spins without tightening, snaps, or will not advance; forcing it can strip the hole or break the fastener.
Powder-actuated pins: fast, but not universal
A powder-actuated tool drives a hardened pin into concrete without drilling a pilot hole. It can save time when fastening thin plywood or furring over a larger area, but the result is permanent and depends on the concrete and the tool’s power setting. Older, very hard concrete may reject a pin; weak or damaged concrete may crumble around it. A pin that is too powerful can split plywood or leave it poorly held.
Use only a tool and pin approved for the base material, and follow its safety instructions. Check for embedded utilities before driving pins, keep clear of edges, and do not use this method for an unknown or safety-critical load. If a test pin bends, fails to seat, or breaks the concrete surface, switch methods rather than increasing power blindly.
When other anchors make sense
Hammer-set anchors are a budget option for light-duty panels where future removal is unlikely. They are quick, but installation is less forgiving: the hole must be the right size, and the anchor must be driven fully without crushing the plywood. If the anchor spins, sits proud or loosens under a hand pull, do not count on it for a loaded shelf or cabinet.
Wedge and sleeve anchors are designed for stronger connections, usually through thicker material or a bracket. They can be overkill for plywood and require enough concrete thickness and distance from edges. Don’t use a heavy anchor simply because it looks stronger; the plywood may fail first, and an oversized hole can weaken the concrete.
Installation details that prevent failures
First, check the concrete for cracks, hollow spots and hidden pipes or wiring. If the wall is actually block or a thin topping over another material, choose a fastener rated for that base rather than assuming it is solid concrete. Keep holes clear of edges and corners; use the product’s stated minimum edge spacing because requirements vary by fastener and concrete condition.
Mark the plywood, drill clearance holes through the wood so the screw clamps it instead of threading into both layers, then drill the concrete pilot holes. Use a sharp masonry bit and let the hammer drill work without excessive pressure. A masonry bit set for hammer drilling is useful if the project has several hole sizes, but match each bit to the anchor instructions.
Before installing the whole sheet, test one fastener. The screw should seat firmly without spinning, and the plywood should sit flat against the wall. If the sheet bows, shim low spots with noncompressible material instead of tightening screws until the plywood bends. For damp areas, use corrosion-resistant fasteners compatible with the environment; ordinary coated screws may not be suitable where moisture is persistent.
For a typical indoor panel on sound concrete, concrete screws are the sensible first purchase. Choose powder-actuated pins when speed is important and the material is approved for that tool. Reserve hammer-set anchors for light, inexpensive work, and use heavier anchors only when the load and the concrete both call for them.