What's inside
As an Amazon Associate I earn from qualifying purchases. This post may contain affiliate links at no extra cost to you.
Small holes in glass or tile are unforgiving: a bit that wanders can scratch a glazed surface, and too much heat or pressure can crack the workpiece. For mounting a mirror clip, soap dish, or small bracket, the best choice depends on the material and hole size. Use a glass-and-tile bit for ordinary ceramic tile, a diamond bit for hard porcelain or glass, and a regular masonry bit only after you are through the brittle surface.
As an Amazon Associate we earn from qualifying purchases at no extra cost to you.


What we cover
Choose the bit for the material
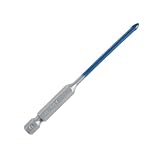
Most pointed carbide bits sold for glass and tile are intended for ceramic tile and glass, especially small holes. They are relatively inexpensive and work well in softer ceramic when used slowly with water. Their spear-shaped tips can skate across a smooth glaze, so a center punch is the wrong fix: striking glass or tile may chip or crack it. Start with light pressure and keep the bit from wandering.
Porcelain is denser and harder than ordinary ceramic. A carbide spear bit may cut slowly, overheat, or wear out after a few holes. A diamond-coated bit is usually the better purchase for porcelain, glass, and hard tile. It abrades rather than cuts with a sharp edge, so it needs steady water cooling and a little patience. If you are drilling only one hole in soft ceramic, the cheaper carbide option is often fine.
For a small mounting hole, a diamond core bit is a common choice when the required diameter is roughly 6 mm (1/4 inch) or larger. Small diamond spear-point bits are useful for narrower holes. Check the bit packaging for the material and diameter; “tile” on the label does not guarantee that a bit is suited to porcelain or glass.
Bit types at a glance
| Bit type | Best fit | Trade-off | Typical use |
|---|---|---|---|
| Carbide spear-point | Soft ceramic tile, occasional small hole | Affordable, but slower and shorter-lived in hard porcelain | Small holes for light-duty wall hardware |
| Diamond-coated spear bit | Glass, porcelain, narrow holes | Needs cooling; coating wears with heat and pressure | Small pilot or mounting holes |
| Diamond core bit | Porcelain, glass, larger holes | Costs more and can wander at startup | Holes for anchors or pipe fittings |
| Masonry bit | Masonry behind the tile | Can chip tile if used on the surface | Continue into the wall after tile is cleared |
What to buy for a small mounting hole
For a one-off hole in glazed ceramic, look for a carbide glass-and-tile bit close to the required diameter. For several holes, hard porcelain, or glass, choose a diamond bit and check whether its maker calls for wet use. A carbide glass-and-tile bit is a sensible budget option for soft tile; a small-diameter diamond tile bit is the more dependable choice for hard porcelain and glass.
Match the hole to the anchor, not just the screw. Many plastic wall plugs require a hole matching the plug’s stated diameter, commonly 6 mm or 1/4 inch for small fixtures, but follow the anchor packaging. The screw may be narrower than the hole. If the fastener needs a larger opening than the tile bit you have, avoid enlarging it by forcing a small bit sideways; use the correct diameter bit.
Use the drill correctly
Use a cordless drill or standard drill in rotary mode, with hammer action turned off. A hammer drill’s impact can fracture tile, and an impact driver is a poor choice because its repeated blows make pressure hard to control. Set the clutch or grip lightly, select a low speed, and hold the drill square to the surface. A practical starting range is about 300–600 rpm for a small diamond bit; follow the bit maker’s speed guidance if available. More speed is not automatically faster: heat is a major cause of bit wear and cracking.
Keep the cutting edge cool. For wet-rated bits, use a small stream or frequent drips of water and keep water away from the drill’s motor and battery. Do not use water with a bit or drill setup that is not suitable for wet work. A strip of masking tape can help a bit start on a slick surface, though it does not replace light pressure. For a core bit, start with the drill tilted slightly to cut a shallow crescent, then bring it upright once the ring has a foothold.
Let the abrasive do the work. Pressing hard can overheat the bit, polish the cutting surface, or crack the tile. If progress stops, withdraw the bit, clear dust or slurry, cool it as directed, and resume. Stop if the tile develops a visible crack or the bit begins to bind.
Drill through the tile, then the wall
Once the tile is penetrated, stop and change to a bit suited to the substrate behind it. Use a masonry bit in rotary mode for brick or concrete; use a regular twist bit for wood or metal framing. Hammer action may be appropriate in masonry only after the tile is fully cleared and the bit is no longer touching it. Keep the hole aligned so the anchor seats straight.
Before drilling, confirm the location is clear of pipes and wiring. Avoid drilling too close to a tile edge, where the remaining material can split; when the fixture allows it, leave at least 15–20 mm (about 5/8–3/4 inch) from the edge. Wear eye protection, support loose glass on a stable backing, and do not drill tempered glass: it can shatter suddenly and is not safely drilled after tempering.