What's inside
As an Amazon Associate I earn from qualifying purchases. This post may contain affiliate links at no extra cost to you.
Mounting equipment to a concrete ceiling is harder than drilling a wall. You are working overhead, fighting gravity, and often drilling into dense concrete while trying to keep the hole straight. The right hammer drill makes the job manageable, but the drill is only one part of the system: bit quality, anchor selection, dust removal, and the equipment’s weight all determine whether the installation stays secure.
As an Amazon Associate we earn from qualifying purchases at no extra cost to you.


What we cover
What to look for in a ceiling-mounting hammer drill
For occasional holes in concrete, a cordless hammer drill with a side handle and at least a 1/2-inch chuck is usually sufficient. Look for a brushless motor, a mechanical clutch, two speed ranges, and a hammer setting that produces several thousand blows per minute. A battery around 4.0Ah or larger is useful overhead because concrete drilling consumes power quickly.
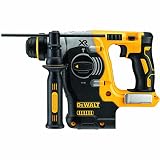
For repeated holes, large anchors, or reinforced concrete, a cordless rotary hammer is the better tool. Rotary hammers use an SDS-Plus or SDS-Max bit system and deliver much more impact energy than a standard hammer drill. They drill faster, require less pushing, and are less likely to overheat. The trade-off is a larger, heavier tool and more expensive bits.
Here is the practical dividing line:
| Tool type | Best use | Typical hole range | Main drawback |
|---|---|---|---|
| Cordless hammer drill | Light equipment, occasional mounting | 1/4 to 1/2 inch | Slow in dense concrete; requires more pressure |
| Cordless rotary hammer | Multiple anchors, hard concrete, larger holes | 1/4 to 1 inch or more | Heavier and more expensive |
| Corded rotary hammer | Long drilling sessions and frequent installation work | 1/4 to 1 inch or more | Needs an outlet and extension cord |
The best drill choice for most jobs
For mounting a light, camera, conduit, cable tray, or small bracket with four 1/4-inch concrete anchors, a good cordless brushless hammer drill is the cheaper option that makes sense. Use a sharp masonry bit, drill slowly, and let the hammer mechanism do the work. You may spend 30 to 90 seconds per hole, depending on the concrete.
Choose a cordless SDS-Plus rotary hammer when there are more than six or eight holes, when the holes are over 3/8 inch, or when you are drilling overhead for more than a few minutes. A rotary hammer can reduce each hole to roughly 5 to 20 seconds. That lower effort matters more than speed: pushing a conventional hammer drill overhead is tiring and makes it easier to wobble or enlarge the hole.
Do not buy based only on the advertised voltage. A compact 18V or 20V hammer drill can outperform a heavier older tool, while battery capacity, impact mechanism, and bit condition have more practical effect. A 5.0Ah battery gives useful runtime, but it also adds weight. For overhead work, a second smaller battery can be more comfortable than one very large pack.
Bits, dust, and hole accuracy
Use carbide-tipped masonry bits rated for rotary hammer use. Standard masonry bits are acceptable in hammer-drill mode, but they cut slowly and wear quickly in hard concrete. For a rotary hammer, use SDS-Plus concrete bits with a four-cutter or similar reinforced tip. Match the bit diameter to the anchor manufacturer’s specification; a hole that is only 1/16 inch oversized can reduce holding power.
Drill at low speed until the bit has established a shallow recess, then increase speed if needed. Keep the drill square to the ceiling. A short piece of tape on the bit is a simple depth gauge, but check the anchor instructions: many concrete anchors need a hole 1/4 to 1/2 inch deeper than the embedment so dust and debris do not stop the anchor from seating.
Dust is a serious failure cause. Brush or vacuum the hole several times, especially after reaching depth. A clogged hole prevents an expansion anchor from seating fully and keeps adhesive anchors from bonding. For overhead drilling, use a dust shroud attached to a vacuum, or have a second person hold a vacuum nozzle close to the bit. Wear eye protection, hearing protection, and a properly fitted respirator rated for silica dust. Do not rely on a paper dust mask.
Choosing anchors for overhead loads
For light, noncritical equipment, concrete screws are quick and removable. They are a reasonable choice for small brackets and cable supports, provided the screw reaches the required embedment and the concrete is sound. A typical 1/4-inch concrete screw may need about 1 inch of effective embedment, but follow the specific product instructions.
For heavier equipment, use listed wedge anchors, sleeve anchors, or concrete screw anchors rated for the load and installation direction. Overhead mounting deserves a safety margin: do not select anchors at their maximum published capacity. Divide the expected load among multiple anchors, account for vibration and impact, and consider what happens if one anchor fails.
Expansion anchors need solid concrete around them. They are not suitable in hollow block, a thin slab, or a section weakened by cracks. Adhesive anchors can work well in difficult conditions, but they require clean holes, correct resin, curing time, and threaded rod installed to the specified depth. Never load them immediately unless the product instructions specifically allow it.
A safer installation sequence
First, confirm that the ceiling is actually structural concrete. Do not drill blindly into a suspended ceiling, post-tensioned slab, embedded conduit, sprinkler line, or electrical run. Use building plans or an appropriate scanner where possible. If the equipment is heavy, expensive, or safety-critical, have the attachment method checked by a qualified installer or engineer.
Mark the bracket holes and use the bracket as a template only if it can be held securely. Start each hole with the drill’s hammer function off if the surface is polished or the bit wanders, then switch hammer mode on. Keep both hands on the drill and use the side handle. Stop if the bit suddenly hits steel; forcing through reinforcing bar can damage the bit and may compromise the concrete cover.
After cleaning each hole, install the anchors exactly as specified. Tighten expansion anchors with a torque wrench when a torque value is provided. Over-tightening can crush weak concrete or pull out the anchor; under-tightening can leave the assembly loose. Finally, attach the equipment and check for movement, cracked concrete, anchor spin, or bracket distortion. Recheck the fasteners after the first day and again after a week if the equipment vibrates.
When a cheaper drill is enough
A basic corded hammer drill or entry-level cordless model is fine for two or three small holes in ordinary concrete, especially if you already own one. Spend the money instead on sharp bits, a side handle, dust control, and properly rated anchors. Upgrade to a rotary hammer when drilling becomes slow, physically tiring, or inconsistent. For larger equipment and repeated overhead work, the faster tool is not merely convenient—it makes it easier to produce straight, correctly sized holes without damaging the concrete.