What's inside
As an Amazon Associate I earn from qualifying purchases. This post may contain affiliate links at no extra cost to you.
An impact driver can install metal roofing screws quickly, but speed is not the main buying criterion. The better choice is a tool with a controllable low-speed trigger, a comfortable grip, and enough battery capacity for a full roof section. Too much speed or pressure can crush a washer, strip a screw, or dimple the panel.
As an Amazon Associate we earn from qualifying purchases at no extra cost to you.



What we cover
What to look for in a roofing impact driver
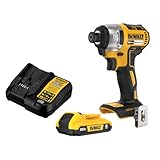
Choose a 12V or 18V/20V cordless impact driver with variable-speed control. An 18V/20V tool is a practical choice for a full-size roof or repeated projects; a compact 12V driver can be easier to manage overhead and is usually adequate for a small shed or occasional repairs. Battery voltage alone does not tell you how controllable a tool is, so try the trigger if possible.
Multiple speed modes are useful, but they do not replace a light touch. Start on the lowest setting and squeeze the trigger gradually. Some drivers provide roughly 1,000–1,500 RPM on a low setting; maximum speeds can exceed 3,000 RPM. The slower range gives you more time to stop as the washer meets the panel. Avoid choosing on torque rating alone: high torque helps drive long fasteners, but makes overdriving easier too.
A 1/4-inch hex collet accepts common nut setters, including roofing-screw sockets. Use the correct size for the screw head and a deep, preferably magnetic setter that holds the fastener without wobbling. For a general selection, compare variable-speed cordless impact drivers by trigger feel, speed modes, weight, and battery options rather than advertised torque alone.
Which driver type fits the job?
| Driver type | Best fit | Main trade-off |
|---|---|---|
| Compact 12V impact driver | Small roofs, repairs, and overhead work | Less battery capacity and power reserve for long sessions |
| 18V/20V impact driver with speed modes | Most DIY roofing projects | Heavier; high output can damage panels if used carelessly |
| Corded or cordless drill with clutch | Low-volume work where careful, repeatable control matters | Slower fastening; a standard drill may struggle with larger fasteners |
A drill with an adjustable clutch can be easier for beginners because it can limit turning force, though the clutch setting still needs testing on scrap. An impact driver delivers short rotational blows and is less likely to twist your wrist when a fastener binds, but those blows can make the screw harder to stop precisely at the end. If you already own a suitable drill and are fastening only a handful of screws, buying an impact driver may not be necessary.
Prevent stripped screws and crushed washers
Metal roofing screws commonly have a sealing washer that should be compressed enough to seal, not flattened out of shape. The correct setting depends on the screw and panel system, so follow the roofing manufacturer’s instructions. As a practical check, the washer should sit snugly against the panel without bulging excessively, splitting, or being pushed out from under the screw head.
Keep the driver square to the panel. A tilted setter can round the screw head or cut into the washer. Start the screw at low speed, ease off as the washer contacts the metal, and stop promptly. Do not lean your body weight on the tool; excessive force can dimple thin panels and damage the coating. If a screw spins without tightening, stop rather than continuing to hammer it. The hole may be stripped or oversized, and the fastener may no longer seal. Follow the panel maker’s repair guidance; simply driving another screw into the same damaged hole may not fix the leak risk.
Before working on the roof, practice on a panel offcut or an inconspicuous area. Drive several screws and inspect both the washers and the metal. If the washer is distorted, reduce speed and pressure. If screws repeatedly stop short, check that the socket fits correctly, the bit is fully seated, and the screw type is right for the roofing material and support beneath it.
Bits, batteries, and safe setup
Buy a nut setter matched to the screw head size; roofing screws often use hex heads, but sizes vary. A poor fit can slip and chew up the head. A magnetic setter is convenient, while a non-magnetic one can be easier to clean if metal debris sticks to it. Keep a spare setter on hand if the job involves hundreds of fasteners. For magnetic roofing-screw nut setters, verify the socket size against the actual screws rather than assuming all roofing fasteners match.
For a larger roof, two batteries reduce downtime. A 2.0Ah pack is lighter, but a 4.0Ah pack generally runs longer and can be more comfortable for sustained fastening if the added weight is manageable. The cheaper option is fine for a small project or occasional repairs, especially if you already own compatible batteries. Buying into a new battery platform adds real cost, so compare the tool-and-battery kit price, not just the bare tool.
Roof work has fall and electrical hazards that a good driver cannot solve. Use appropriate fall protection and follow local safety requirements. Keep the tool, battery, and fasteners secured against sliding, and do not work on a wet, icy, or windy roof. Metal panels can have sharp edges; wear suitable gloves and eye protection. A cordless impact-driver kit with a larger battery makes sense for sustained work, but safe access and correct screw installation matter more than extra torque or top speed.