What's inside
As an Amazon Associate I earn from qualifying purchases. This post may contain affiliate links at no extra cost to you.
What we cover
What the chuck changes—and what it doesn’t
A drill chuck grips the smooth shank of a drill bit. In a keyed chuck, a toothed key tightens the jaws; in a keyless chuck, you twist the chuck by hand. Both can hold bits securely when they’re in good condition and tightened correctly. The chuck style doesn’t increase a drill’s torque or make an undersized bit suitable for the job.
For high-torque drilling, the practical difference is how reliably you can clamp the bit, especially with large bits, tough material, or repeated starts and stops. A slipping bit can spin in the jaws, damage its shank, and overheat the chuck. The right choice depends on the drill, the bit, and how much effort you want to put into tightening.
As an Amazon Associate we earn from qualifying purchases at no extra cost to you.
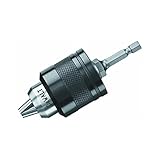

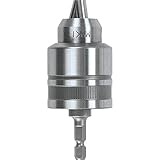

Keyed chucks: strong clamping, slower changes
A keyed chuck gives you leverage. Insert the key into a chuck hole and turn it to tighten the jaws; many chucks have three holes so you can tighten at more than one point. That leverage makes a keyed chuck a dependable choice when a bit needs a firm grip for a demanding hole-saw, auger, or large twist-bit job.
The trade-off is speed and convenience. You need the correct key, and it’s easy to misplace. Tighten it evenly rather than cranking only one hole as hard as possible. A loose key must be removed before starting the drill—it can become a dangerous projectile. If the chuck is worn, a key won’t fix damaged jaws or a mechanism that no longer moves smoothly.
Consider a keyed drill chuck when secure clamping matters more than fast bit changes, or when you’re replacing a compatible chuck on a drill built to accept one.
Keyless chucks: fast changes, grip depends on your hands
A keyless chuck is faster for jobs that alternate between a pilot bit, clearance bit, and driver accessory. It also eliminates the separate key. On a good drill with a sound chuck, firm hand tightening is enough for many woodworking, metalworking, and general repair tasks.
Its limitation shows up when the bit needs more clamping force than you can comfortably apply by hand. Gloves, oily hands, a stiff chuck, or reduced grip strength can make tightening harder. Some drills have a spindle-lock feature or electronic assistance that helps, but not all do. Don’t assume that running the drill briefly in reverse will tighten a loose bit; it can instead let the bit slip or loosen further, depending on the chuck and operation.
A heavy-duty keyless chuck can be a sensible choice for frequent bit changes, provided it fits the drill and is rated for its use. The word “heavy-duty” alone is not proof of compatibility or performance.
Keyed vs. keyless at a glance
| Factor | Keyed chuck | Keyless chuck |
|---|---|---|
| Bit changes | Slower; requires a matching key | Faster; no separate key |
| Clamping effort | Key provides mechanical leverage | Depends mainly on hand force and chuck design |
| High-load drilling | Useful when extra clamping is needed | Works well when properly tightened; may be harder to secure by hand |
| Common nuisance | Lost key or starting drill with key still in | Bit slips if jaws aren’t tightened firmly |
| Best fit | Heavy drilling with infrequent changes | Mixed jobs with frequent bit changes |
Match the chuck to the drill and the job
First check the drill’s manual. A replacement chuck must match the spindle connection, capacity, and intended operating speed. Common chuck capacities include 3/8 inch and 1/2 inch; capacity refers to the largest shank the chuck can accept, not the diameter of the hole you can drill. Some chucks use a threaded connection, while others mount on a taper. A chuck that looks similar may still be the wrong fit.
For a cordless drill in a typical home workshop, a sound keyless chuck is usually the more convenient choice. For repeated heavy drilling where bits have slipped despite correct tightening, a keyed chuck may offer better control. But a chuck swap is not automatically an upgrade: it can add cost, affect balance, and may not be approved for the drill. If the drill uses a proprietary mounting system, replace the chuck only with a compatible part.
For masonry, use a hammer drill with a bit suited to the material; changing from keyless to keyed does not replace hammer action. For driving screws, an impact driver generally uses hex-shank accessories rather than a three-jaw drill chuck. An adapter can be useful for light drilling, but it adds length and may not hold a round-shank bit as securely as a proper drill chuck.
Prevent slippage and damage
Before tightening, wipe dust and oil from the bit shank. Open the jaws enough to seat the bit straight, then tighten until all jaws grip it evenly. Leave the chuck jaws on the smooth shank, not on the flutes of a twist bit. With a keyed chuck, tighten at multiple holes; with a keyless chuck, grip the rear sleeve as directed by the tool maker rather than relying on the motor to do the work.
Start at a controlled speed and keep the bit aligned. High torque at low speed can twist a large bit suddenly if it catches. Use the drill’s side handle when supplied, keep a firm two-handed hold, and avoid loose sleeves or gloves near rotating parts. For a large hole in wood, a pilot hole or a bit designed for the task can reduce binding. In metal, use suitable cutting speed and lubricant where appropriate. Neither tactic excuses a loose workpiece: clamp it before drilling.
When to replace the chuck
Replace or have the chuck inspected if jaws visibly wobble, fail to close evenly, stick, or repeatedly let clean, correctly seated bits slip. A worn chuck can also cause noticeable runout, where the bit circles instead of spinning true. Don’t keep compensating by overtightening; that can damage the chuck, bit, or key. If the chuck is only dirty, follow the manufacturer’s cleaning guidance—avoid pouring lubricant into it, since residue can reduce grip.
Choose keyed for leverage when demanding drilling and slower changes are acceptable. Choose keyless for convenience when the chuck is compatible and your hand can tighten it firmly. For either style, a sharp, appropriate bit and a steady setup matter more than the label on the chuck.