What's inside
As an Amazon Associate I earn from qualifying purchases. This post may contain affiliate links at no extra cost to you.
A small wall-mounted soap dispenser is a light load, but a bathroom wall is a damp place and the dispenser gets tugged every day. The right anchor depends less on the dispenser’s weight than on the wall material, the screw size, and how firmly the mounting plate needs to sit. If you can fasten into a stud, do that. If not, choose an anchor that fits the wall and the dispenser’s mounting holes.
As an Amazon Associate we earn from qualifying purchases at no extra cost to you.



What we cover
Check the wall before buying
Look behind the proposed location for plumbing and wiring before drilling, especially around a sink or shower. A stud finder can help locate framing, but confirm its reading rather than drilling blindly. Avoid drilling directly above or below outlets, switches, and plumbing fixtures unless you know where the services run.
Identify whether the wall is drywall, tile over drywall, or masonry. A magnet can find drywall screws and help locate a stud. For tile, use a tile-rated bit to get through the glaze without hammer mode, then use an anchor suited to the material behind the tile. Do not drive a drywall anchor into tile itself.
Check the dispenser’s instructions and mounting plate. Some require two screws; others use a keyhole slot or a particular screw diameter. The anchor must accept the supplied screw, and its flange must fit behind the plate without keeping the plate from sitting flat.
Anchor options at a glance
| Anchor type | Best use | Trade-off |
|---|---|---|
| Plastic expansion anchor | Light dispenser on sound drywall | Cheap and simple, but easier to loosen under repeated pulling |
| Self-drilling threaded anchor | Quick installation in ordinary drywall | Needs clearance behind the wall; can damage the paper if overtightened |
| Metal hollow-wall anchor | More secure fastening when there is no stud | Requires a correctly sized hole and may need a setting tool |
| Toggle-style anchor | Hollow wall where a larger, spread-out bearing area is useful | Needs a larger hole and room behind the drywall |
Best choice for most small dispensers
For a light dispenser with two mounting screws, a properly installed metal hollow-wall anchor is a sensible default when you cannot hit a stud. Its expanded legs clamp the back of the drywall, distributing the load more broadly than a basic plastic plug. Choose an anchor rated for the wall thickness and screw diameter; do not treat a package’s maximum pull-out figure as a guarantee for a bathroom installation. Ratings vary by drywall condition, installation, and load direction.
A metal hollow-wall anchor kit with a setting tool costs more than a small bag of plastic anchors, but can be worthwhile if the dispenser will be refilled often or its handle is likely to be pulled. Set it squarely and stop once the anchor is firmly clamped. Continuing to tighten can crush the drywall and weaken the mounting point.
When a cheaper anchor is enough
A plastic expansion anchor or self-drilling anchor can be fine for a genuinely light dispenser that is used gently, especially if the mounting plate has two well-spaced screws. These are inexpensive and quick to fit. The weak point is often not the dispenser’s static weight but repeated outward force: a user pulls the dispenser away from the wall, the anchor rocks, and the drywall paper tears. If the anchor spins while you tighten the screw, or the plate moves when pressed by hand, remove it and use a different fastening method rather than tightening harder.
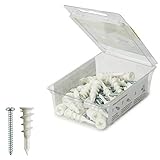
For a low-cost option, compare a small assortment of self-drilling drywall anchors. Check the package’s screw range and required wall thickness. These anchors are not suitable where the wall is brittle, already damaged, or too thin for the anchor’s threads to grip securely. They also need a clear cavity behind the drywall; hitting a stud or pipe can stop installation or cause damage.
Install carefully
Mark the holes through the dispenser’s mounting plate, then remove the plate and check that it is level. If using a drilled anchor, use the hole diameter specified on its packaging. A cordless drill with a small bit is enough for ordinary drywall. Keep the drill straight and use low speed; a larger hole than required leaves less material for the anchor to grip. Do not use hammer mode on drywall or on tile.
For a toggle anchor, make sure the toggle can pass through the hole and unfold in the cavity. For a metal hollow-wall anchor, use its setting tool if the instructions call for one. The screw should pull the anchor snug without spinning. Fit the mounting plate and tighten its screws until secure, not until the plate bends or the drywall dimples.
Use both mounting points when the plate provides them. Two anchors spaced apart resist twisting better than one anchor, but only if the plate sits flat and both anchors are fully seated. If the supplied screws are unusually short or do not match the anchors, use compatible screws of the diameter and length specified by the anchor manufacturer. Leave enough screw length for the plate, but do not use a screw so long that it risks contacting something behind the wall.
Studs, tile, and other exceptions
If a stud lines up with one mounting hole, a wood screw driven into the stud is usually stronger than a drywall anchor. Use a second suitable fastener at the other hole if needed, and avoid over-tightening the screw. If the holes miss the stud, a small shift in dispenser position may be better than relying on an anchor for both points.
For tile over drywall, drill slowly through the tile with a suitable carbide tile drill bit set, with hammer mode off. Once through the tile, use the anchor recommended for the backing material and hole size. Tile can crack if the bit wanders, pressure is excessive, or the anchor is forced into an undersized hole. If the wall is hollow, a hollow-wall anchor may work only if the tile and backing can tolerate its clamping pressure; when in doubt, consult the dispenser or anchor instructions before drilling.
Check the mount after installation
Before loading the dispenser, push gently on the mounted plate in several directions. It should not rock, click, or pull away from the wall. Fill the dispenser and test it with a light touch. Recheck the screws after a few days of use. If movement develops, stop using it and repair the mounting point; a larger or more secure anchor may require relocating the hole to undamaged drywall.