Key takeaways
- A $30 attachment solves this problem for most people. A $250 tool solves it for anyone doing it daily.
What's inside
As an Amazon Associate I earn from qualifying purchases. This post may contain affiliate links at no extra cost to you.
Every trade eventually meets the same problem: a hole that needs drilling in a space too tight for a normal drill. Between studs, inside a cabinet, above a ceiling grid, behind a pipe. Your drill measures roughly eight inches from chuck jaw to battery and the gap you are working in is four. Leaning on it harder does not change the geometry. Choosing the best right angle drill comes down to three honest answers: how tight your worst hole is, how big the bit has to be, and how often you will be in that position.
The third question is where money gets wasted. Most people need a right angle tool a handful of times a year and buy three times the tool they need. A smaller group needs one daily and buys a light-duty gearbox that spends a season being destroyed by auger bits. Get the frequency right and the rest of the decision almost makes itself.
As an Amazon Associate we earn from qualifying purchases at no extra cost to you. Product prices and availability are accurate as of the date shown and are subject to change.




Three ways to solve it
1. Right angle attachment. A small gearbox that chucks into your existing drill and turns the bit 90 degrees. Cheapest option, works surprisingly well for light work. Your drill still supplies the motor, the clutch and the speed control, so what you are actually buying is a set of bevel gears and an output holder. The catch is length: the attachment adds a body behind the bit, so measure the whole stack, not the head alone.
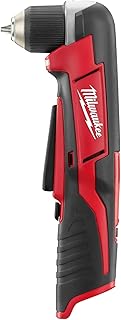
2. Compact right angle drill. A dedicated tool with the motor in line and the chuck at 90 degrees. Short head, decent power, easy to control. Head height is the number worth comparing across models, and the difference between a head that slips into a joist bay and one that does not is often less than half an inch. Most take a 3/8″ chuck and let you steady the body with your free hand.
3. Full-size right angle drill. A serious tool for running auger bits through joists all day. Heavy, high torque, and it will break your wrist if a bit binds — these have clutches for a reason. The long body is deliberate: it braces against framing so the tool cannot spin, and the rear handle gives your whole hand something to hold instead of your fingertips. This is a rough-in tool, not a general purpose drill.
The three questions that pick the tool
Every spec sheet is a variation on the same three questions. Answer them in this order.
- How tight is the tightest hole? Measure it, then add the bit. Clearance runs from the surface you are drilling to whatever is behind your hands. A head that fits with nothing chucked in it does not fit.
- How big is the biggest bit? Twist bits and screws: attachment. Up to around an inch in wood: a compact right angle drill, taking its time. Anything larger, or any bit with a lead screw pulling itself into dry framing: full size, both handles, no exceptions.
- How often will you be in that position? Twice a year is an attachment. Weekly is a compact tool. Daily is a full-size machine plus a compact one for everything else, because the big tool is miserable for small holes.
When the answers disagree, bit size wins. Torque is what hurts you, and no amount of clever positioning makes a light gearbox survive a 2″ auger.
What to buy at each level
Right angle drill attachments
Chucks into the drill you already own. For occasional cabinet and electrical work, this is all most people need. Look for a metal gearcase, greased bevel gears, an indexing collar so you can rotate the body to a comfortable angle, and a real keyless chuck rather than a set screw. Set your drill to a low clutch setting for the first few holes: the attachment will always fail before the drill does, and a slipping clutch is cheaper than stripped gear teeth.
Compact right angle drills
A dedicated tool with a short head. Electricians and plumbers who drill studs regularly should own one. Compare head height first, battery platform second, chuck third. Two speed ranges are worth paying for: the low range is where you drill 3/4″ and up, the high range handles small bits and driving. A light at the head sounds like a gimmick until your own body is blocking the only light inside a sink base.
Full-size right angle drills
For running large augers through framing. Use both handles and respect the torque — these do not slip, they twist. What you are paying for is torque management: an anti-kickback or mechanical clutch, a low speed range where augers actually cut, and handles you can reposition for the bay you are standing in. Corded still makes sense here, since rough-in work is usually near power and a cord does not fade halfway through a hole.
Which one you need
| Situation | Best option | |
|---|---|---|
| Occasional cabinet hardware | Attachment | |
| Electrical rough-in, weekly | Compact right angle drill | |
| Running 2″ | augers through joists | Full-size right angle drill |
| Plumbing service work | Compact 12V right angle |
Two situations that table does not cover. Driving fasteners in a corner, such as cabinet installs and pocket screws, is a right angle impact driver job: hex holder, no chuck, excellent on screws and poor at holes much over 1/2″. And remodel work where you cannot see what is behind the finish favours the compact tool, because you want to be able to stop the instant the bit finds a nail.
What separates a good pick from a bad one
Cheapest band: it is all in the gears
A good attachment has a machined metal case, properly packed bevel gears, and an output that holds a bit square. A bad one is a plastic shell over stamped gears. Test it like a chuck: fit a long straight bit, spin it slowly, and watch the tip. A tiny circle is normal, a visible orbit means your holes will wander and you will blame your own hands.
Middle band: head height and honest gearing
The weak compact models are a standard drill motor bolted behind a right angle head, which makes them tall at the nose and long overall. The good ones put the motor in line with the grip, use a metal gearcase, and keep the head as short as the gears allow. Brushless earns its place here for the shorter motor and the runtime, not for the sticker.
Top band: the clutch and the handle
On a full-size tool the safety hardware is the product. A clutch that intervenes early, a genuine low gear, and handle positions you can change without tools. A big right angle drill with one fixed handle and no clutch is not a bargain.
Mistakes I see
- Buying the framing tool for cabinet work. It is too heavy, too long, and far too strong for 1/8″ pilot holes in a face frame.
- Putting an auger in an attachment. The lead screw pulls, the gears bind, and something inexpensive turns into scrap.
- Forgetting bit length. Short augers and stubby spade bits exist for exactly this work. A standard 6″ bit undoes the clearance you paid for.
- Running augers at high speed. Low gear, steady feed. Speed does not cut wood, the lead screw does.
- Bracing against something that moves. If the tool kicks, whatever you were leaning on becomes part of the accident.
- Adopting a new battery platform for a tool you use twice a year. That is when the attachment is the smart purchase.
Safety with high-torque models
- ✘ Full-size right angle drills produce enough torque to break wrists and arms
- ✘ Always use the auxiliary handle and brace against something solid
- ✘ Use models with an anti-kickback clutch where possible
- ✘ Never operate one-handed with a large auger bit
Positioning is the habit that saves you. Set up so that if the bit stops, the tool rotates away from your body rather than into it, keep your feet where you can shift weight, and stay off a ladder with a large auger whenever there is any other option. Nails and hidden blocking are what stop augers, and they stop them without warning. If the bit slows and the lead screw stops pulling, back it out instead of pushing harder.
FAQ
Is an attachment strong enough for auger bits? No. Attachments are for small bits and light work. The gearbox is small, the housing is small, and an auger with a lead screw applies exactly the kind of load it was never designed to absorb.
12V or 18V? 12V compact for service and cabinet work; 18V for stud drilling. A 12V tool is shorter and lighter, which is the whole point in a tight space, but it will struggle once holes get past about 3/4″ in framing.
Do I need this if I have a compact drill? A short compact drill covers many tight spots. The right angle tool is for the ones it cannot. Measure the worst hole you have faced in the last year and decide against that number, not against the average one.
Corded or cordless for a full-size tool? Corded if you are on rough-in near power all day and want the same output on the last hole as the first. Cordless if you work in occupied houses, crawl spaces, and places where a cord is a genuine hazard.
The short version: buy the attachment if the problem is occasional, buy the compact tool if the problem is weekly, and buy the full-size machine only if you drill framing for a living. Then buy short bits to match, because the best right angle drill in the world still cannot fit a bit that is longer than the space.
Compare right angle drills →